General Immigration Information
Learn more about visas, immigration best-practices, and other helpful information!
What is the I-797 Form?
The I-797 Form is a document the USCIS uses to communicate with applicants.
Last Updated: December 2022.
The Form I-797 is a document the United States Citizenship and Immigration Services (USCIS) uses to communicate with applicants.
The most common reason we see form I-797s be sent to our customers is when USCIS is issuing them receipt notices for their application. USCIS will send applicants Form I-797 approximately 4-6 weeks after the applicant submits an application to them. The purpose of this form is to notify the applicant that USCIS has received the application and has started processing it.
Please Note: Make sure to keep a copy of all I-797 forms for your personal records. They can commonly be used as evidence for other USCIS forms you may fill out.
How to Read an I-797 Form?
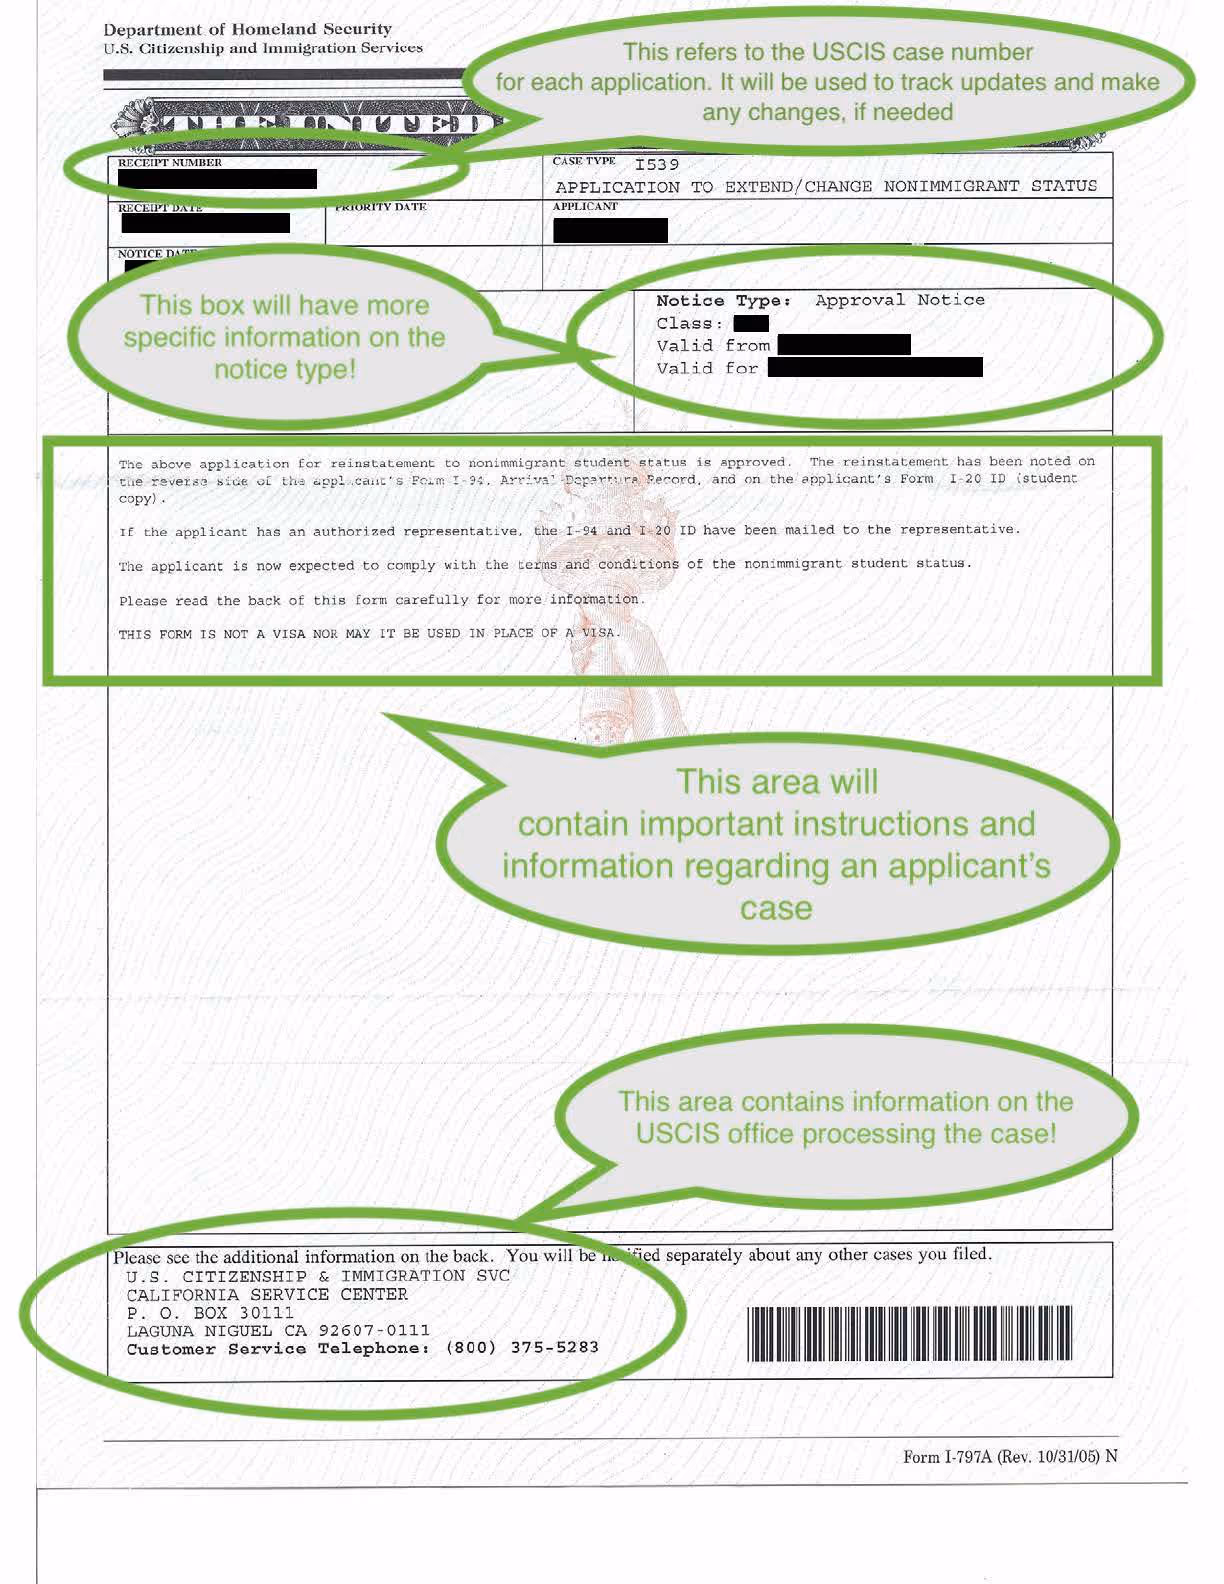
This is what an I-797 Form looks like:
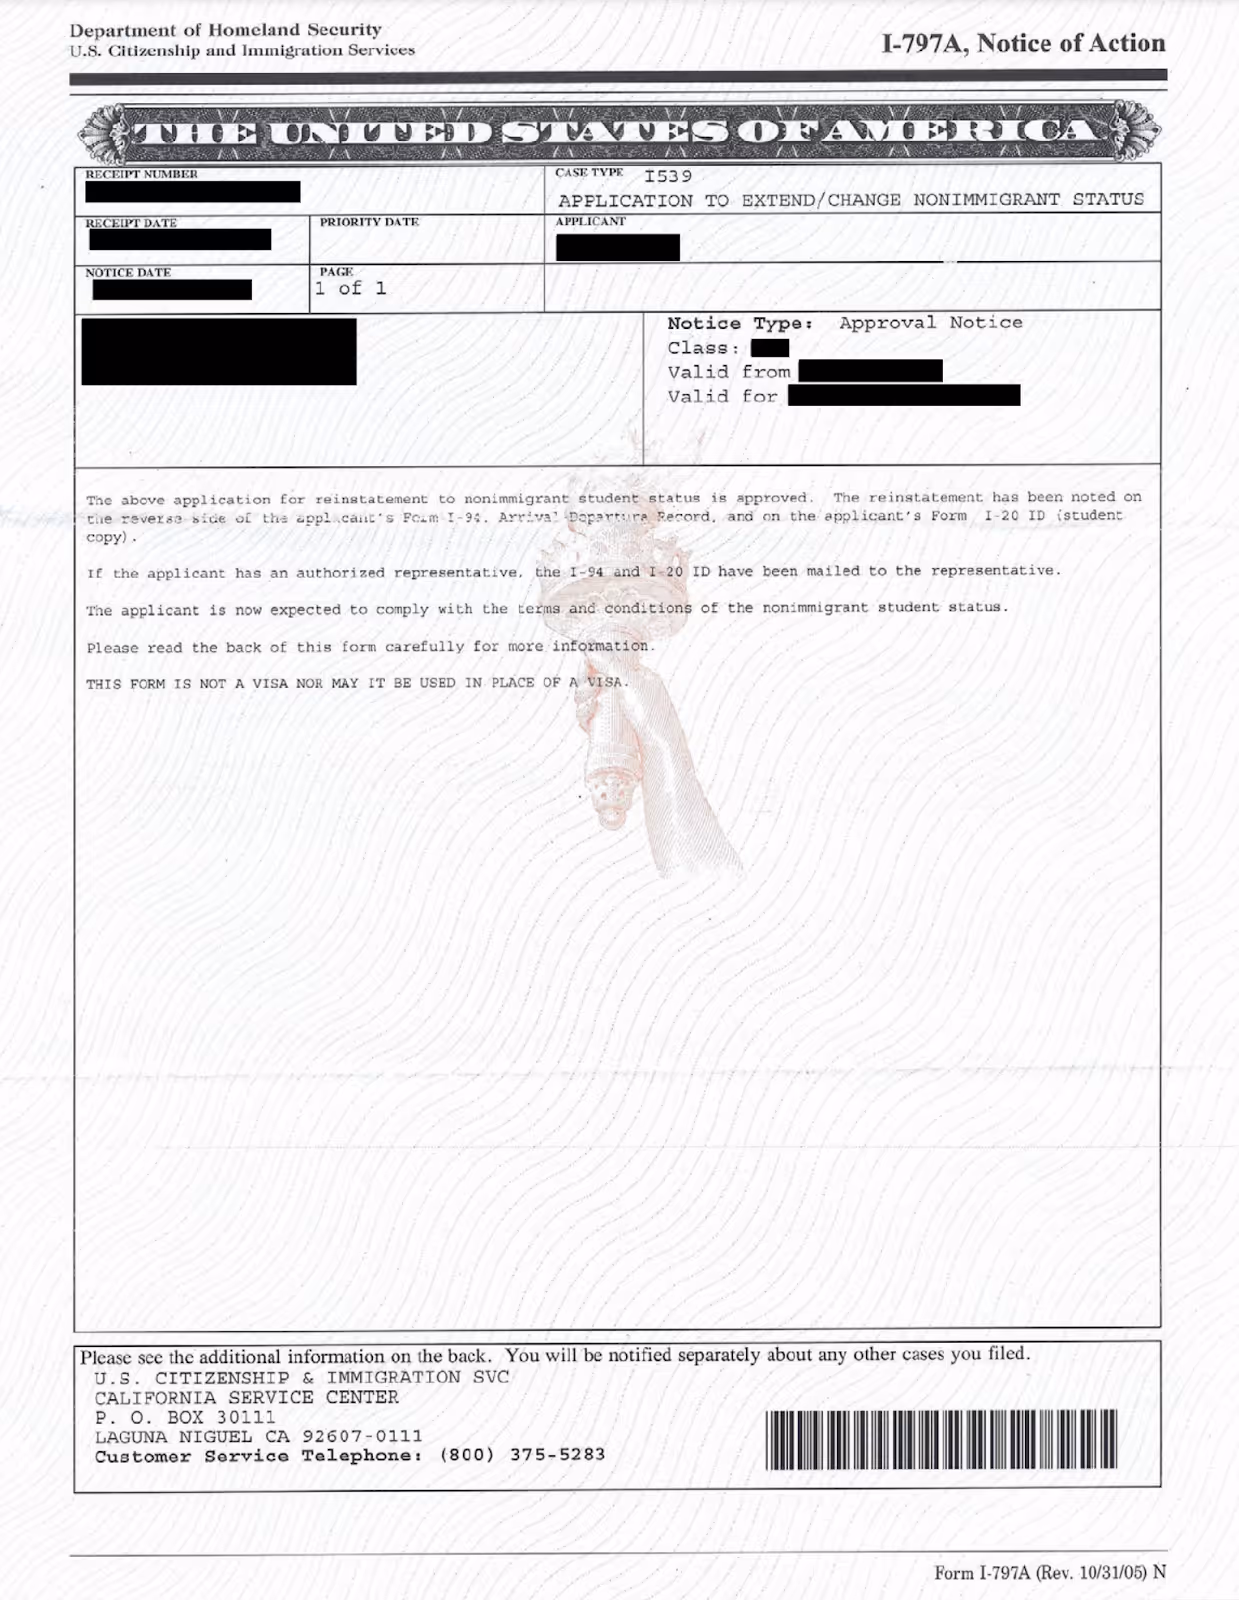
Here are some general areas to look for when reading your receipt notice:
There are seven different I-797 forms and each serve a different purpose as outlined in this article:
- Form I-797, Notice of Action: Receipt Notice
- Form I-797A, Notice of Action: Replacement for an I-94 Form
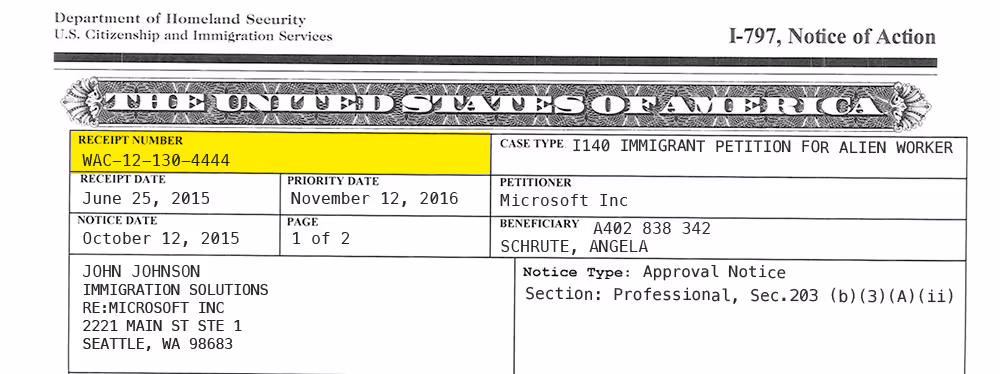
- Form I-797B, Notice of Action: Form I-140, Petition for Alien Worker
- Form I-797C, Notice of Action: Important Information
- Form I-797D: Includes a Benefit Card
- Form I-797E, Notice of Action: Request for Evidence
- I-797F, Transportation Letter: Travel Permit
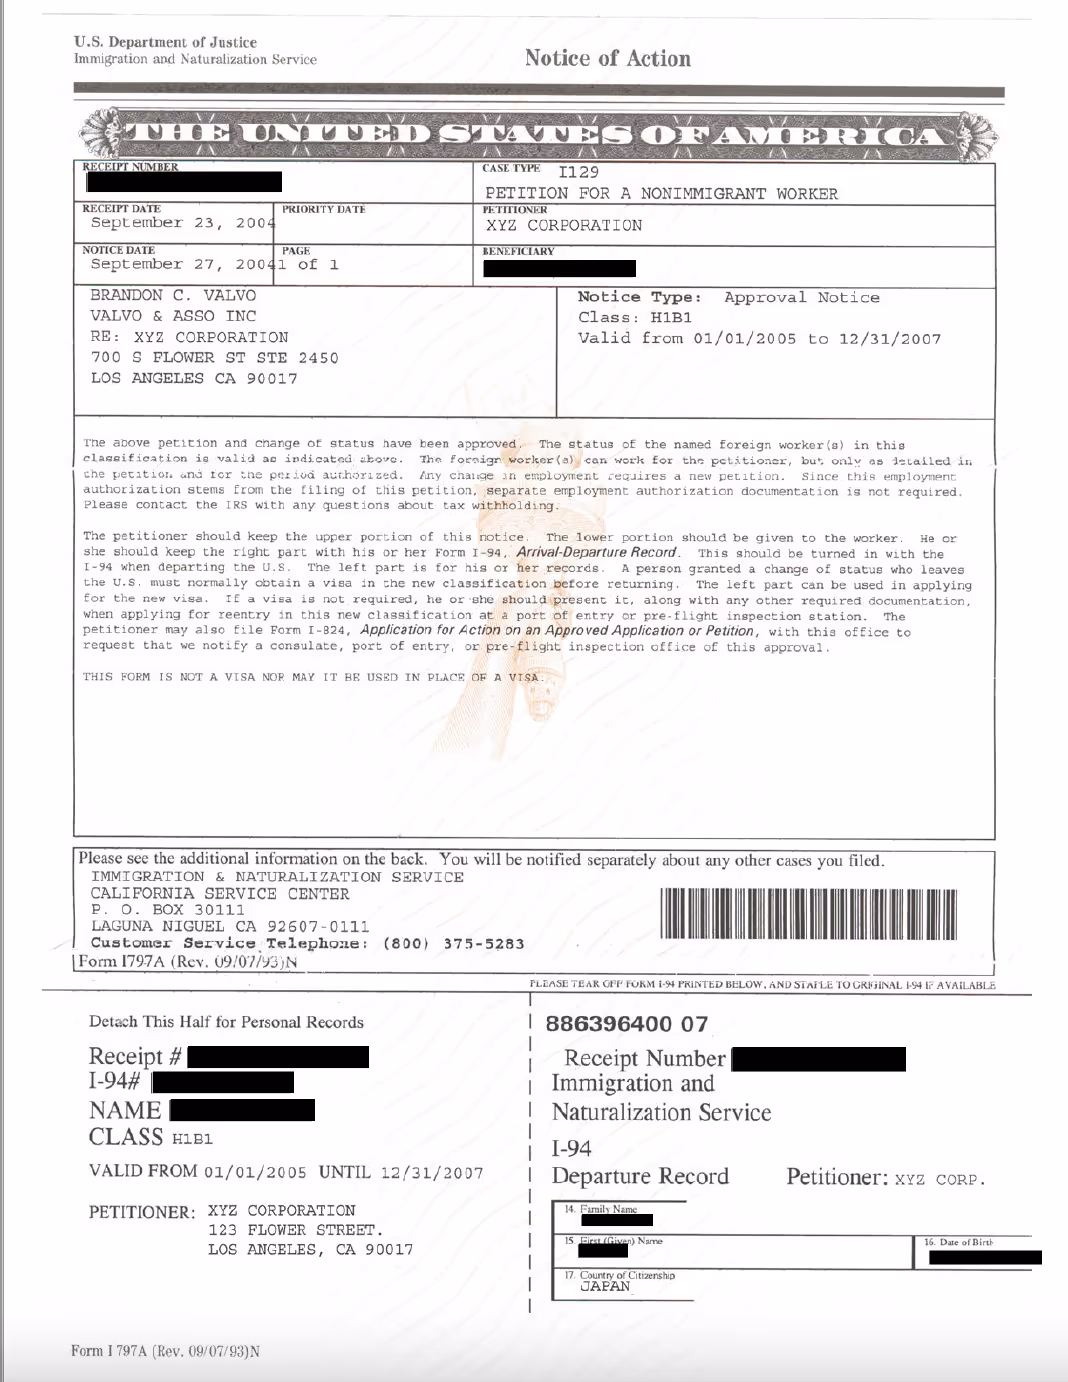
1. Form I-797, Notice of Action: Receipt Notice
This I-797 form is simply a receipt informing you that the application or petition has been received or approved. Note that this is just the receipt, not the official document. Therefore this document cannot be used to work or travel.
However, the form is still very useful. It gives you information about your application, including your receipt number. Your receipt number is a 13-digit-long code you can use to track your case online. Simply use this USCIS Case Status Checker.
If you lose your receipt number, you can schedule an InfoPass appointment where you’ll meet with a USCIS officer who can provide you with information about your case. USCIS will require that you bring valid identification to the appointment. You may also request this information through USCIS’s live chat option, or call USCIS directly at 1(800) 375-5283.
For many cases, USCIS also sends out a separate notice that will have instructions for setting up your Online USCIS Account.
2. Form I-797A, Notice of Action: Replacement for an I-94 Form
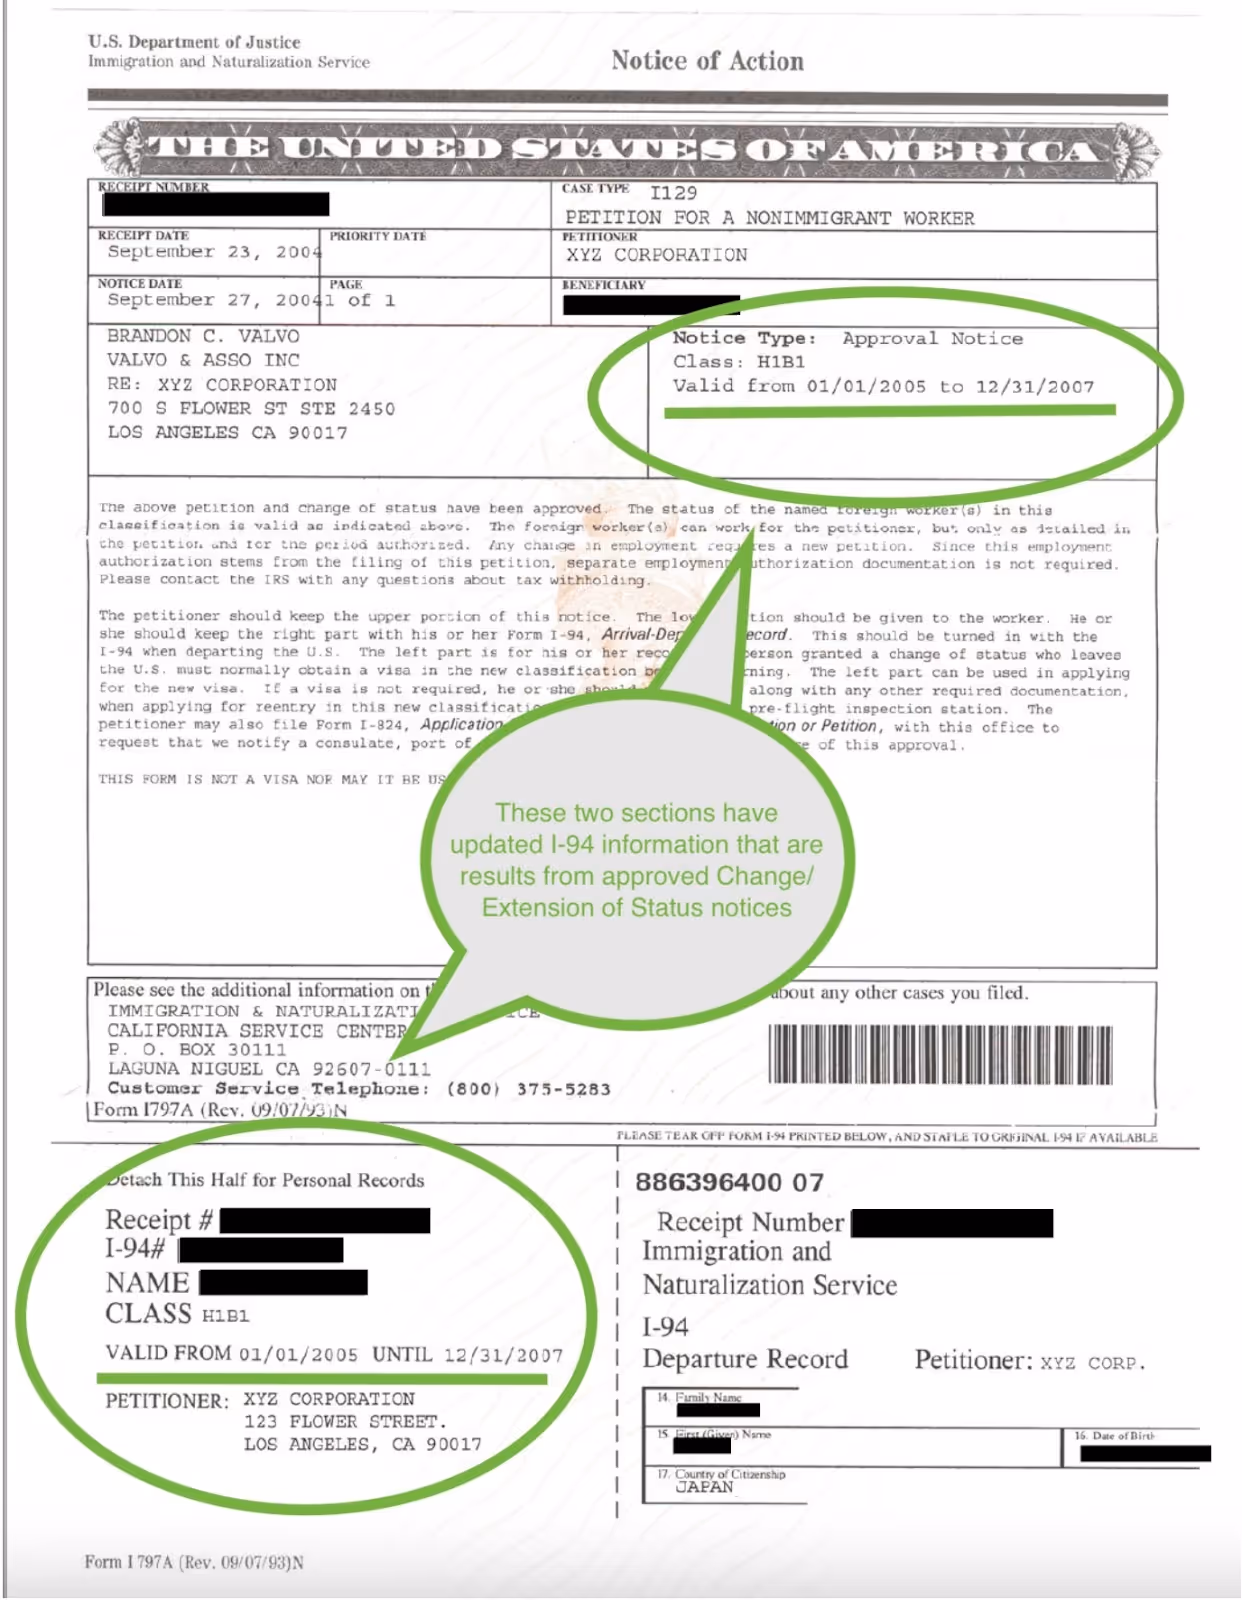
Form I-797A Notice of action is sent as a replacement for the Form I-94 for applicants already in the U.S. This typically means that a change of status application has been approved and the immigrant is legally able to stay in the U.S. up until their new I-94 expiration date. The Form I-94 can be found at the bottom of Form I-797A and functions as the official document. The body of the document will provide additional guidelines. This form includes the date of admission, the class of admission, and the date to which they are admitted to stay.
Here is what an I-797A, with the replacement I-94 Form looks like. It includes an I-94 number, which is usually the same number as your original I-94, new VALID FROM and ADMIT UNTIL dates, and the new, or extended Class of Entry description.
To find the new I-94 portion, you can check in the following spots of the form:
Please note: If you have not filed for a change or extension of status within the U.S., you will need to obtain your I-94 directly through the U.S. Customs and Border Protection website. To increase efficiency, reduce operating costs, and streamline the admissions process, U.S. Customs and Border Protection (CBP) has automated the I-94 Form. The paper document is only given in limited circumstances. If you need a copy of your Form I-94, you may request it here.
Please note: If you originally received a paper I-94 before the CBP automated them online, and it has since been lost, you may need to submit a Form I-102 with USCIS in order to receive a replacement. For more information on this, please see here.
3. Form I-797B, Notice of Action: Form I-140, Petition for Alien Worker
Form I-797B is issued when the applicant submits Form I-140, Immigrant Petition for Alien Worker. The body of the document will include instructions. The bottom section will include important information for admission to the U.S. depending on the applicant’s circumstance, like all I-797 forms, this form will include details about your application.
Please note: The I-797B Form is required for any Employment-Based Adjustment of Status Applications.
4. Form I-797C, Notice of Action: Important Information
This is perhaps the most common I-797 form. It is very important that you read this document carefully as it usually tells you the next step in the application process. In addition to the regular information, the Form I-797C will inform the applicant of a rejection, transfer, re-opening, or scheduled/re-scheduled appointment.
Form I-797C is also the form that will come separately, at the same time or a few weeks after, the initial receipt notices that will include instructions for setting up your Online USCIS Account. For more information on this, please go to USCIS’s website here.
Typical appointments include a biometrics appointment or an interview with a USCIS officer. If you receive a Form I-797C, pay close attention to what it says. Ignoring or misreading the instructions can delay your case.
5. Form I-797D, Notice of Action: Includes a Benefit Card
The Form I-797D will generally include a benefit card. This could be a green card or another official document such as an Employment Authorization Document (EAD) or Advance Parole. Like the regular I-797 form, you will not need to do anything with this form. However, it is still important to keep a copy for your personal records.
6. Form I-797E, Notice of Action: Request for Evidence
Many USCIS forms require additional evidence. This is called a Request for Evidence (RFE). If the USCIS does not receive all the required evidence in an application, they will send the form I-797E. In this form, they will explain the issues with the evidence already provided or simply state that no evidence was included.
If you receive this form, make sure to read it carefully! The Form I-797E will often include a time limit and specific instructions. If you never respond to a request for evidence, your application will most likely be denied.
When responding to a Request for Evidence: Only submit photocopies of official documents unless original documents are specifically requested because the USCIS will not return evidence to you and will most likely destroy it after the case is closed.
Click here for more information about responding to Requests for Evidence.
7. Form I-797F, Transportation Letter: Travel Permit
This is the only I-797 form that is not a “Notice of Action.” This document allows overseas applicants to travel. If you receive Form I-797F, simply follow the guidelines provided in the document as they are specific to your case type.
What to do if you lose an I-797 Form and want, or need, a replacement?
If your I-797 has been lost or stolen, you will need to reach out directly to USCIS to help obtain your receipt number. To do so, you can schedule an appointment with them online here, or call them directly at 1-800-375-5283.
The Ultimate H-1B Visa Guide: How to Hire International Employees
The Ultimate H-1B Visa Guide: How to Hire International Employees
Last Updated: March 11, 2021
Human resources professionals must understand the hiring needs of their organization and how to recruit and retain qualified workers. For many companies, this means hiring foreign nationals. Recent headlines have focused on one of the most common types of work visas: H-1B. More than 460,000 H-1B visas — nonimmigrant visas for specialty occupations — were granted in 2013, the Economic Policy Institute reports. According to the 2017 Forbes survey, there was a 21% year-over-year increase of companies that said they would sponsor workers from overseas. This increasing work visa demand juxtaposed with tightening regulations on immigration has created a more intense environment for attracting and keeping foreign talent. It is more important than ever for companies to understand how to navigate the current immigration landscape in order to hire the best resources and help their companies maintain a competitive advantage.
This guide walks human resources professionals through how to successfully hire foreign nationals.
Step 1: Petition USCIS for a Nonimmigrant Visa
There are many different types of nonimmigrant visas. Some of the most common work visas are H-1B, TN, L-1A, L-1B, E-3, and O-1. This article will focus on H-1B.
What is the H-1B Visa?
The H-1B visa is a nonimmigrant, employment-based visa that U.S. companies can use to hire employees in specialty fields that require theoretical or technical expertise, such as computer science, finance, math, engineering, health care and architecture. U.S. immigration law requires that the visa holder have a bachelor’s-level education or higher. If the applicant doesn't have at least bachelor’s degree, in some cases they may be able to show degree equivalence through work experience or other qualifications.
What is H-1B season?
Every year, the deadline for filing an H-1B is April 1, and the earliest possible date a foreign worker could start employment is October 1. H-1B "season" is the time of year leading up to the April 1 deadline when employers are preparing their H-1B visa petitions. Most companies start this process in January or early February.
What is the H-1B cap?
USCIS limits the number of H-1B visas that are granted each year. Current limits are as follows:
- Regular H-1B visas: 65,000.
- H-1B visas for people with a U.S. master's degree or higher: 20,000
If USCIS receives more than 65,000 regular petitions and 20,000 advanced degree petitions during the first five business days after April 1, they use a lottery system to randomly select petitions to be granted. If an employee’s petition is not selected, USCIS will notify you and return the filing fees.
Are there exemptions to the H-1B cap?
Yes, there are. The following types of employers are not subject to the annual H-1B visa petition limits:
- Colleges and Universities.
- Nonprofits that are part of or associated with a college or university (such as a hospital associated with a university).
- Nonprofit research organizations and governmental research organizations; and
- Employees whose H-1Bs have already been counted against the annual H-1B cap (includes employees transferring their H-1B from one employer to another, as well as those filing for an H-1B extension).
It should also be noted that 6,800 of the 65,000 H-1B visas are reserved for Chilean and Singaporean nationals (known as H-1B1 visas).
H-1B Visa Eligibility Requirements

The position being offered must meet one of the following criteria:
- Bachelor's or higher degree or its equivalent is normally the minimum entry requirement for the position;
- The degree requirement for the job is common to the industry or the job is so complex.
- The employer normally requires a degree or its equivalent for the position; or
- The nature of the specific duties is so specialized and complex that the knowledge required to perform the duties is usually associated with the attainment of a bachelor’s or higher degree.
The person you wish to hire must also meet one of the following criteria:
- Completion of a U.S. bachelor's degree or higher required for the specific occupation from an accredited college or university.
- Completion of a foreign degree that is the equivalent to a U.S. bachelor's degree in the specialty occupation (requires academic equivalency evaluation).
- Have an unrestricted state license, registration, or certification which authorizes the employee to fully practice the specialty occupation and be engaged in that specialty in the state of intended employment; or
- Completed education, training, or progressively responsible experience in the specialty that is equivalent to the completion of such a degree, and have recognition of expertise in the specialty through progressively responsible positions directly related to the specialty occupation.
Are there filing fees associated with the H-1B?
There are a number of filing fees that you, as the petitioning employer, are required to pay:
- Base filing fee: $460 (no exemptions)
- Fraud prevention and detection fee: $500 (no exemptions)
- Employer sponsorship fee: $1,500 for employers with more than 25 full-time employees; $750 for employers with fewer than 25 full-time employees. This fee may be waived under certain circumstances.
- Public Law 114-113 fee: $4,000. This fee is required if the employer has more than 50 employees AND more than 50 percent of employees are on H-1B or L-1 status. This fee may also be waived under certain circumstances.
How long is the H-1B Visa good for?
An H-1B visa is granted for three years and may be renewed for another three years, for a maximum of six years — minus any documented time spent outside of the U.S. This time may be “recaptured" and added to the end of the 6-year period.
The H-1B visa cannot be renewed at the end of the six-year period unless certain steps have been taken toward the filing of a permanent resident (green card) application.
Human Resources Checklist
- Review the background of the potential hire to ensure they meet the specialty/degree requirements.
- Review the recruitment and selection process to ensure the sponsorship criteria are met.
- Review the rate of pay for the position, ensuring it is the prevailing wage for the position and geographical area.
- Collect and submit the following (in duplicate):
- The certified labor application from the Department of Labor (form ETA 9035)
- Letter on company letterhead and signed by the company representative describing the nature of the U.S. job opportunity, including the job description.
- Support letter confirming the job offer to the foreign worker and explaining the terms and conditions of the offered employment.
- Form G-28, if an attorney or accredited representative is being used.
- Form I-129, two copies with original signatures on both.
- H-1B Supplement to Form I-129.
- H-1B Data Collection pages.
- Visa history (two originals)
- Resume
- Clear copy of unexpired passport
- Clear copy of Form I-94
- Clear copy of transcripts, diplomas, and degrees; if necessary, include a U.S. academic equivalency evaluation.
- Required government filing fees.
Prepare to maintain a public access file
Finally, it is the employer's responsibility to maintain a public access file on each H-1B employee, and this file must be made available to the public upon request. Each file must contain:
- A signed copy of the certified labor condition application (LCA) from the Department of Labor.
- A statement of explanation outlining how the employer set the employee's salary.
- Documentation of the appropriate prevailing wage for the position and geographical area.
- Notice that the certified LCA has been posted at the company.
Note: Do not included the employee's personnel file in the public access file. The personnel file should be kept separately.
Step 2: Start Permanent Residency for Your Employee
Most companies start the permanent residency (green card) process for their employees after 6 – 12 months of employment. The permanent residency process is expensive, often costing between $10,000 and $20,000. However, because most nonimmigrant visas have strict time limits, companies that hire foreign talent can only keep those employees long term if they sponsor them for a green card.
For most professional employees, the first step in the permanent residency process is PERM Labor Certification. This step is very complex in terms of timing and requirements. The Department of Labor is very strict with PERM cases, and there are seemingly innumerable missteps that can result in a denial. Denials are very frustrating to employees who want their green cards as soon as possible and look very disapprovingly on any delay. Because PERM Labor Certification is so expensive, denials are also very costly to the company.
What does the PERM Labor Certification process look like?
The DOL is primarily looking for two things:
- Evidence that there are not enough qualified U.S. workers to fill the position being offered; and
- Hiring a foreign worker will not hurt the wages and working conditions of similarly employed U.S. workers.
As the employer, you'll be asked to prove:
- That you've performed an extensive and unsuccessful hiring search among U.S. workers. This includes notifying the U.S. workforce at your company; and
- That the salary you're offering either equals or exceeds the "prevailing wage" for the position in that geographical area.
How is "prevailing wage" determined?
The Department of Labor provides for the prevailing wage for each position sponsored under PERM Labor Certification. Most prevailing wages are determined through a request to the Office of Foreign Labor Certification. In some instances, employers may use a relevant salary survey to “challenge” the Department of Labor’s prevailing wage assessment and thereby secure a lower prevailing wage.
Is there a filing fee to apply for PERM Labor Certification?
There is no government filing fee for PERM Labor Certification, however, the mandatory recruitment includes two Sunday newspaper ads. These ads must be placed in a newspaper of general circulation in the geographic area where the position is located, and these ads can be very expensive – sometimes costing $2,000 - $3,000. Most companies also hire an attorney to complete this process, and the legal fees typically cost several thousand dollars.
What Comes Next?
PERM Labor Certification typically takes about 9 – 12 months from start to finish. The company must then file the Form I-140 and Form I-485 for the employee. Depending on several factors, including the employee’s country of origin, the rest of the permanent residency process can take anywhere from 1 – 12 years – sometimes longer. During that time, visa employees should maintain a nonimmigrant visa status until they are able to get an EAD work card as part of their I-485 process.
How to Get a J-1 Exchange Visitor Visa
Understand the basics of applying for a J-1 Exchange Visitor Visa
The purpose of the J-1 visa, also known as an Exchange Visitor visa, is to develop a global understanding through educational and cultural exchanges, especially in the arts, sciences, and education. All J-1 visa holders are expected to return to their home country to share their new experiences and knowledge. This program is not intended as a path for immigration, but it is a great path for foreigners who would like to have a long-term experience in the United States.
What is a J-1 Exchange Visitor Visa?
A J-1 visa is a non-immigrant visa issued by the United States to research scholars, professors and exchange visitors participating in programs that promote cultural exchange, especially to obtain medical or business training within the U.S. All applicants must meet eligibility criteria, English language requirements, and be sponsored either by a university, private sector or government program.
The J-1 classification is assigned to foreigners participating in an approved program for teaching, instructing or lecturing, studying, observing, conducting research, consulting, demonstrating special skills, receiving training, or receiving a graduate medical education or similar training.
Common examples of exchange visitors include, but are not limited to:
- Teachers
- Students
- Research assistants
- Government visitor
- Trainees
- Professors or scholars
- Specialists
- Nannies/Au pairs
- Camp counselors
Am I eligible for a J-1 visa?
Before you decide to apply for a J-1 visa, you should make sure that you are eligible. Sponsors will have specific eligibility criteria for their program. In addition to this, all exchange visitors must meet the language and insurance requirements, meaning that participants must be proficient in the English language and that participants and their accompanying family members must have medical insurance with a minimum benefit requirement. Your sponsor will provide you with pre-arrival information and a post-arrival orientation with program-specific information and any contractual obligations, in addition to monitoring your progress and well-being during your stay. You should contact them with questions about the English proficiency and insurance benefit levels required for your program.
Who Qualifies for the J1 Visa?
How much does it cost to apply for a J-1 visa?
In addition to meeting eligibility criteria, you are required to pay certain fees. You will need to pay the $160 nonimmigrant visa application processing fee, unless you are sponsored by the U.S. government in which case the fee is exempt. This fee needs to be paid before your interview, and you will need to provide a receipt showing the fee has been paid. The program sponsor should also tell you if you must pay a SEVIS I-901 fee to the Department of Homeland Security (DHS), but often the sponsor will pay the fee for you. If your sponsor pays the SEVIS, they will provide you with a receipt confirming payment. Be aware that there may be other fees for your program, such as an application processing fee.
How do I apply for an exchange visitor program?

Applying for any visa is a complicated task, but the process for a J-1 visa can be broken down into 3 basic steps.
1. Find a Sponsor
You first need to find a program and a sponsor. The U.S. Department of State (DOS) is responsible for the Exchange Visitor Program, and they approve public and private organizations to act as sponsors for exchange visitors. All approved options are on the designated sponsor list. First, decide on a program, and then research the listed sponsoring organization. Each sponsor will have a different application process so call their office or search their website for more information.
Remember that your sponsor is vital to your experience as an exchange visitor. They should provide you with the information necessary to successful complete your program and to smoothly transition to living in the U.S. Additionally, your sponsor also has the ability to terminate your participation with the approval of the DOS. Be smart when selecting a program and a sponsor to ensure your needs and goals align with their services.
2. Receive a DS-2019 Form
Once a sponsoring organization accepts your application, they will send you a Form DS-2019, also known as a Certificate of Eligibility for Exchange Visitor Status. This form permits a prospective exchange visitor to schedule an interview at a U.S. embassy or consulate to obtain a J-1 visa to enter the United States. The Form DS-2019 also provides a brief description of the exchange visitor’s program, including the start and end date, category of exchange, and an estimate of the cost of the exchange program.
You should work closely with your sponsoring organization who will help you through the application process. An official who is authorized to issue Form DS-2019 is known as a Responsible Officer (RO) or Alternate Responsible Officer (ARO). The RO or ARO in your sponsoring organization will explain what documents are needed from you in order for them to issue you a Form DS-2019.
3. U.S. Embassy or Consulate Application
After you have obtained a Form DS-2019, you may then apply for a J-1 visa through the U.S. Department of State at a U.S. embassy or consulate.
You will need to do 3 things to apply:
- Complete the online J-1 Visa application (DS-160).
- Print the application form confirmation page to bring to your interview.
- Pay the nonimmigrant visa application processing fee.
- Gather required documents (list below).
- Attend an interview at a U.S. embassy or consulate (if you are age 14 through 79, with exceptions).
The waiting time for an interview appointment for applicants can vary, so submit your visa application as early as possible. Remember, though, that you may not enter the United States in J-1 status more than 30 days before your program begins.
During your visa interview, the officer will determine whether you qualify for the visa. You should also expect your fingerprints to be taken (ink-free). You will need to establish that you meet the requirements under U.S. law to receive the category of visa for which you are applying by showing the required documentation. After your interview, your application may need further processing, and you will be informed by the officer if this is the case. When the visa is eventually approved, you will be informed how your passport with your visa will be returned to you. Be sure to plan ahead because you may not receive your visa right away.
Here is a list of required documents you need to bring to the interview:
- Your Form DS-2019 (Certificate of Eligibility) issued by your program sponsor.
- A valid passport (note: must be valid for at least six months beyond your program end date).
- A printed out Form DS-160 confirmation page.
- A receipt showing payment of the visa application fee (note: this fee in non-refundable)
- A 2×2 photograph that meets format requirements.
- Other supporting documents – check the specific embassy or consulate website
Note that all trainee or intern applicants also submit a Training/Internship Placement Plan, Form DS-7002.
For most detailed information on the application process, visit the Bureau of Consular Affairs’ exchange visitor visa website or the Department of State’s exchange visitor program website. For information on making a visa interview appointment, paying the application processing fee, and more, visit the U.S. embassy or consulate website where you will apply for your visa.
How long can I stay in the United States with a J-1 visa?

You are allowed to stay in the United States up to 30 days after your program end date. If you do not leave on time, you may be ineligible for visas in the future. Additionally, if your sponsor terminates your participation for just cause, you will be expected to depart the United States immediately. You will not be entitled to the post-completion 30-day period because you did not successfully complete your program.
If your visa expires during your program period and you do not plan to travel outside of the U.S., you do not need to renew the visa. If you travel outside of the United States when your visa is expired, you will have to apply for a new J-1 visa in your home country. Note that your sponsor is responsible for helping you with everything related to your J-1 program, including authorizing travel outside of the U.S. and ensuring that your J-1 non-immigrant documents are valid. Contact your sponsor if you are concerned about your visa.
Remember, your current J-1 visa is only applicable for your current program and sponsor. When you complete your program, you are expected to leave the United States. If you intend to pursue a 2nd J-1 exchange program (in a different category and with a different J-1 sponsor), you will need to apply for a new J-1 visa for the new program to re-enter the U.S. for the 2nd program.
Additionally, if any of the following describe your program, you are subject to a two-year home-country physical presence requirement, meaning you will be required to return to your home country for two years at the end of your exchange visitor program.
Two-year Home-country Physical Presence Requirement Conditions:
- Government-Funded Exchange Program.
- Graduate Medical Education or Training.
- Another Program of Specialized Knowledge or Skill
Note: There is a possibility of waiving this last requirement.
What is the duration and extension period for a J1 visa?
How do I extend or adjust my exchange visa program?
To extend your program, you must discuss it with your sponsoring organization. If your sponsor agrees to extend your program, they will send a new Form DS-2019 with the new end date and any other necessary information. The sponsoring organization will apply for your extension through the Department of State. Note that there is a nonrefundable fee of $367 which your sponsor may have you pay. Contact your sponsor if you would like to extend your program.
Can I change my status while on a J-1 visa?
While in the United States, you may decide that you would like to switch to a different visa status, such as a change from a J-1 visa to an F-1 visa. If you would like to change your J-1 nonimmigrant status to a different one, you will first need to work with your sponsoring organization and receive a new Form DS-2019 and submit that form with your Form I-539, Application To Extend/Change Nonimmigrant Status to the USCIS. There is a $370 filing fee with this application.
Is a J-1 Visa Holder Eligible to apply for a Green Card?
Can I work on a J-1 Visa?
Follow the guidelines in your program description. If your exchange visitor program is a work-program (research, teaching, etc.), work only under the terms of the specific program. In some situations, J-1 holders may work for non-sponsor employers if they meet eligibility requirements. Contact your sponsor with any work-related questions.
Can my family come with me?
Your spouse and any unmarried children under 21 years of age, regardless of nationality, are entitled to J-2 classification. Your family will apply for their J-2 visas while you are applying for your J-1 visa, and the process is very similar. Contact your sponsoring organization or the U.S. embassy or consulate at which you will apply for more information.
Sometimes, exchange programs will not allow family to accompany J-1 participants. If this is a concern for you, ask potential sponsors about this before you apply.
With regards to work, your spouse and children can be authorized to work in the United States. However, their income may not be used to support you. To apply for work authorization as a J-2 nonimmigrant, your spouse or child should file Form I-765, Application for Employment Authorization. Form I-765 will ask for your eligibility category; for J-2 participants it’s (c)(5).
Have any questions?
Post your questions to the J Visa section of the discussion board.
Or you can schedule a free consultation with an immigration attorney here.
How Do I Find My Form I-94?
Instructions on how to access your Form I-94, Arrival/Departure Record
As a foreigner, upon entering the United States you will receive the Form I-94, Arrival/Departure Record. This document, issued by a Customs and Border Protection (CBP) Officer, provides you basic information about your stay such as your arrival date, visa status, and the date you are required to leave the U.S.
There are now two formats in which you may receive your Form I-94 - paper and electronic - but as of April 30, 2013, most Arrival/Departure Records are created electronically. In this case, you will be given an annotated stamp in your passport instead of a paper form. If you are provided a paper Form I-94, a CBP officer attaches it to your passport and stamps your departure date on the form.
Although an electronic version cuts down on paper and drastically decreases the possibility of losing your document, it can be slightly more complicated to access, especially if it's your first time locating your record. Don't worry though - here's a guide on how to access your electronic Form I-94, along with a few useful tips and tricks.
How to Access Your Form I-94
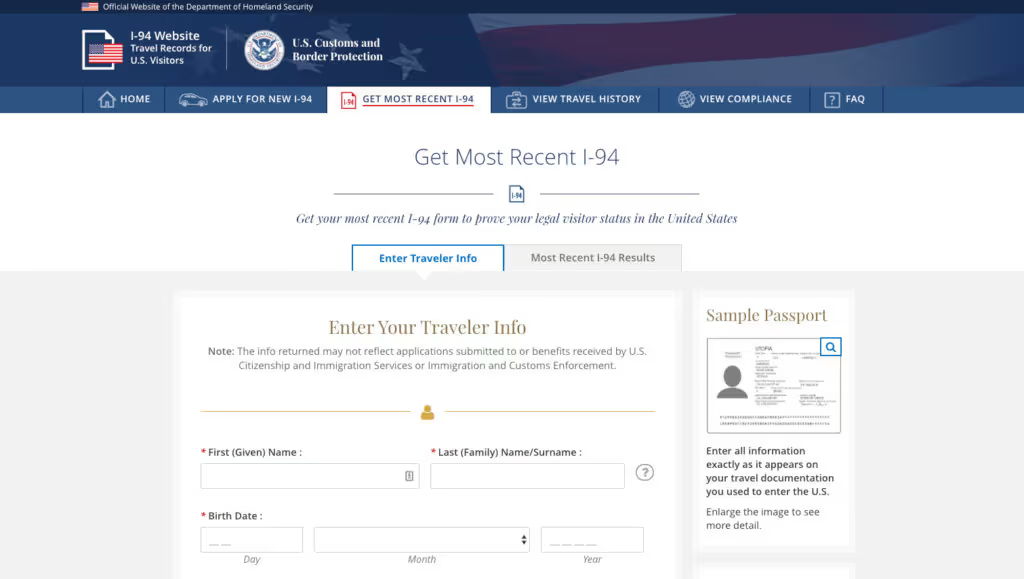
To access your I-94 record, go to CBP's website. Once there, click on the Get Most Recent I-94 button. A page will then pop up requiring you to agree to the following terms before continuing: "By accessing this website, you understand and acknowledge that: You are declaring under penalty of perjury pursuant to 28 U.S. Code § 1746 that you: (1) are only seeking records about yourself, (2) are seeking records about someone for whom you are the legal guardian, or (3) you have the consent of the person whose records you are seeking. You are not authorized to access this website to retrieve records of another person unless you are the person's legal guardian or you have the person's consent." After consenting, you will see a page similar to the screen shot below. Enter the required information.
I-94 Website Travel Records for U.S. Visitors - U.S. Customs and Border Protection
[caption id="attachment_2080" align="aligncenter" width="800"]
I-94 Website Travel Records for U.S. Visitors - U.S. Customs and Border Protection[/caption]
Entering the data in the required fields, if done correctly, will allow you to access your electronic Form I-94. However, all information must be entered accurately; even one simple misspelling or formatting error will prevent you from accessing your record. If you're having trouble accessing your record, try the following troubleshooting tips.
Enter your name exactly as it is written on your passport. If this does not work, attempt to enter your name in a different format.
- Check your visa, airline ticket, boarding pass, or your submitted Form DS-160, Online Nonimmigrant Visa Application (if available) for any variations in the spelling of your name. If there are differences, try entering each one as they appear on these documents.
- In some countries, the first name may be written as the last name on the passport. If this is the case, try switching the order of your names.
- Your passport may include both your first and middle name, but your electronic Form I-94 may list these both as your first name. It's also possible that your middle name is not included in the electronic record. Pay attention to these details.
- If your name is hyphenated, and you cannot gain access to your electronic I-94 by entering your name as it appears, remove the hyphen and try again. Likewise, if you have two first or last names with a space between them, such as "Mary Anne," try entering them without a space as "Maryanne."
- Each name field has a 25-character limit. If your name exceeds 25 characters, try entering it without any spaces as far as it will allow you.
Check Your Passport
Consider multiple entry options for your passport number.
- If both letters and numbers appear in your passport number, try entering a space after the letter(s). For example, if your passport number appears as LR573892 on your passport, try entering it as LR 573892.
- If the date your passport was issued is part of the passport number, try removing these digits when you enter it in.
- If you have a Mexican passport, try entering your passport number without the first two digits. You can also try removing the last two digits.
- If the valid visa is in an expired passport, try entering the old passport number instead of the new one used for entry.
- Sometimes the passport booklet number differs from the number listed on your bio page. Try both.
If You Still Can't Access Your Form I-94
If you still cannot access your electronic Form I-94 after trying the above tips, the next step is to call or visit your local CBP deferred inspection office. Some offices can solve most problems over the phone, but others may require an in-person visit.
What is Consular Processing?
Learn about the Consular Process and how it serves as one of the most popular paths to a green card.
Updated: March 31, 2020.
"Consular processing" is the term used when applying for an immigrant visa from outside the U.S. You will be working with both U.S. Department of State and U.S. Department of Homeland Security as you finish your green card application. If you live outside the U.S. at the time of filing, consular processing may be your only path for immigrating to the U.S.
We are happy to help you through any step of this process. Finishing the whole green card process can be stressful and overwhelming. Don't worry though, contact us and we will be with you every step of the way.
Step 1: Determine your eligibility to immigrate and submit a petition
To get started, you need to determine if you're eligible to apply for a green card. Use our Eligibility Quiz to find if you are eligible to become a permanent resident of the United States. The petition that you file will be determined by the type of eligibility - most common petitions are the I-130, Petition for Alien Relative, and the I-140, Immigrant Petition for Alien Workers. The petition at this point in the process will be sent to U.S. Citizenship and Immigration Services.
Step 2: Await the decision on your immigrant petition
Once the appropriate person has filed the correct petition on your behalf, the next step is to wait for USCIS’s decision. If you are approved and you reside outside the United States: USCIS will send the approved petition to the Department of State’s National Visa Center. The petition will remain there until an immigrant visa number is available for you. For some cases, such as the spouse of a U.S. citizen, there are immigrant visa numbers immediately available.
Step 3: Submit with the National Visa Center
The National Visa Center (NVC) will notify you and your petitioner of three things:
- When they've received your visa petition
- When a visa is about to become available (if applicable)
- When and where to submit your immigrant visa processing fees and supporting documentation
The NVC will give you directions to set up an account where you can submit your fees and submit your application. This is also when you should file Form DS-260, Application for Immigrant Visa and Alien Registration. And in most cases, USCIS will also require the petitioner to file Form I-864, Affidavit of Support. The affidavit is the petitioner's promise to support you financially if you cannot support yourself.
The NVC is also collecting information on Public Charge. Certain applicants may be asked to present or complete a Form DS-5540 at the visa interview. Immigrant visa applicants are encouraged to complete the DS-5540 in advance. The USCIS will review all paperwork and request any additional evidence needed. If they request more evidence this can lengthen your processing time. In order to avoid this, it is important to be thorough in your initial submission.
Step 4: Go to your interview
Once those things happen, the consular office will schedule your interview.
When an appointment becomes available, the NVC will send an interview letter with information on the medical exam and a list of the required documents for the interview. During your interview a consular official will review your case and decide if you are eligible for an immigrant visa.
In some consular offices, you may get approved at the interview itself; in other cases, you will be asked to return to pick up your paperwork if you've been granted a green card. It depends on the policy of your local office.
Step 5: Once your visa is granted
Once you are notified that your visa has been granted, you will be given a packet of information known as a "visa packet". DO NOT OPEN THIS PACKET.
You will now need to pay the USCIS immigrant fee. Unless you are among the exemptions below, this fee must be paid; you will not be granted a green card without paying it.
Step 6: When you arrive in the U.S.
When you arrive in the United States, give your Visa Packet to the U.S. Customs and Border Protection officer at the port of entry. This officer will determine whether to admit you into the United States. If the officer admits you, you have been granted lawful permanent resident status and you may legally live and work in the United States. You should receive your green card within 45 days of your arrival.
Note: If the applicant does not enter within the six months allotted on the visa they may not be allowed into the country without further processing at the Consulate.
Welcome to America!
How Immigrant Entrepreneurs are Making America Great Again
How Immigrant Entrepreneurs are Making America Great Again
Last Updated: January 15, 2020.
In polls, Americans and immigrants alike overwhelmingly cite economic opportunities as the number one reason people choose to immigrate to the United States (74%). About half of Americans believe that once immigrants are here, their talents, experiences and hard work strengthen our nation and in particular improve food, music, and the arts while around a quarter of Americans say they have a friend or relative who has recently immigrated to the U.S. While many can agree that immigrants have the potential to add economic, cultural, and social value to a place, some U.S. cities have gone as far as declare that immigrants are "imperative" to their continued growth and success.
It is no secret that both our nation's demographics and economic mainstays are changing. More and more baby boomers continue to retire and less and less babies are being born, so it naturally follows that the native-born American workforce is shrinking. Globalization has taken a toll on domestic manufacturing companies, something that American metropolitan areas have been tied to in the past. Those deft enough to notice these changes and recognize their consequences are making plans to adapt and are turning to immigrants for the answer.

According to a report by the American Immigration Council, "Cities and regions looking to stem population decline and stimulate economic growth are seeking to attract immigrants and encourage immigrant entrepreneurship. Immigrants play an important role in establishing “main street” businesses (retail, accommodation and food services, and neighborhood services), which are important for generating neighborhood-level economic growth and revitalization.” The numbers support this claim with immigrants making up about 13 percent of the country’s total population, 16 percent of the labor force, 18 percent of business owners, and a whopping 28 percent of “main street” business owners nationally.
After recognizing that immigrants run the majority of shops in the "Little Village", with the second highest business tax revenues in the city, Chicago, Illinois decided to embrace this entrepreneurial vibrancy with their "New Americans Plan". With the tagline, "Chicago Welcomes the World", this plan espouses the goal of making Chicago the most immigrant-friendly city in the world. An advisory committee made up of 50 business, academic, civic, philanthropic, community and immigrant advocacy leaders meet regularly to develop immigrant-friendly strategies and ensure Chicago’s status as a "vibrant and welcoming international city". Initiatives from this committee range from the creation of a small business incubator and the promotion of tourism in immigrant neighborhoods to parent engagement centers and city employee cultural sensitivity training.
Around the same time, Dayton, Ohio launched the "Welcome Dayton" plan involving over 100 members of the community which states, “communities across America are at a crossroad: to welcome and integrate new residents and help them on a path to citizenship, or to allow old stereotypes, fears and misconceptions to hinder future success.” In order to capitalize on the economic potential in its immigrant-dense neighborhoods, Dayton community leaders provide education to all potential entrepreneurs about the many local services that are available to help make their ideas a reality.

In Nashville, Tennessee which is considered to be a relatively new immigrant destination, nonprofits and community-based organizations such as Tennessee Immigrant and Refugee Rights Coalition (TIRRC) and Conexión Américas have led the way in the promotion of immigrant entrepreneurship. The city has focused on three inter-dependent areas of integration: social, economic, and civic. Nashville has even established the Mayor’s New Americans Advisory Council and the Mayor's Office of New Americans (MONA) with a goal to give "New Americans the tools they need to access economic and educational opportunities—to the benefit of all Nashvillians.”
A fourth and more recent example took place last year, when Salt Lake City Mayor Ben McAdams and Salt Lake City Chamber President Lane Beattie announced the "New Americans Task Force", aimed to welcome and encourage foreign-born entrepreneurs in the state of Utah. According to Mayor McAdams, "Welcoming people here is not only the compassionate thing to do for our community, but it also brings resiliency and vibrancy to our economy. We all know that our country, and especially our state, is growing rapidly. It turns out that much of that growth is due to a jump in the percentage of residents who were foreign-born. They are adding to our strong economy." This bold move to reshape local business and government policy makes sense knowing that immigrants contributed $8 billion to Salt Lake County in 2014 alone.

The Queen of Alterations
One woman, who immigrated to Bountiful, Utah, just north of Salt Lake City, from the Philippines at age 32, felt welcomed and encouraged by her community to follow her dream and run a business as a seamstress.

Ever since she was a little girl, Leilani Drumm loved to sew. "As a kid, I would find paper and cut out a little dress. I ended up getting a degree in accounting but all I really wanted to do was sew." When Leilani followed her new husband to his military base in Utah, she held jobs at a variety of places, including the military base and later a factory and a department store. When Leilani's husband sustained a back injury and was forced to change careers, money became very tight. As Leilani put it, " At first I had nothing here - life was really hard." Things changed when Leilani's friend, a recent immigrant from Japan, told her about the alteration business she'd started. Leilani was confident in her skills because she knew she could do more than just small alterations, she was a dressmaker. That friend went on to encourage Leilani in a conversation that she refers to as a stepping stone, "She really helped me get out of my shell." Shortly before her idea became a reality, Leilani found out that she was pregnant. "I call her my lucky baby. I got pregnant, then I got the business, and that was the start of everything!" That was almost 19 years ago. "Now my daughter is going to college and I am able to support her with my same business and it's such a blessing."
Leilani has largely felt comfortable and welcomed in her community. The people, she says, are what she likes the best about living in America. "They're all just really nice. If I ever have a problem here I know they will help me right away because they know me already." That same kindness is what seems to be the key to her shop's success. "To start a business, first of all, you need to be friendly! A lot of the people keep coming back and they tell me not to go anywhere - they like me a lot." Leilani is not exaggerating, either. Many of her customers bring business from across county lines and some even travel from out of state. In a business that mostly gains customers through word of mouth, connection is crucial. Leilani feels it's important to try and relate to the challenges her customers are having. "Most of my customers have troubles in their life and sometimes they're depressed about something. I tell them they can just come to my shop one day and we can talk about it. Sometimes I will even take them to lunch. I try to help them with their feelings. I really do listen and I think that's the best way to be connected to people." Policemen or veterans are especially welcome at Leilani's with a special rate. She also tries to give discounts in a situation where she can tell money is tight because she says she "understands their feelings".
Of course working with people all day isn't always easy. "I really like my job but it can be stressful with all the wedding dresses and before prom. There's always one customer out of a hundred each year that's really hard to deal with. But usually my customers are really thankful and seeing them really happy with the work I did, is payment enough. When I see my wedding dresses from start to finish, I really am so happy and proud that I can do that for people." It's not just Leilani's personal skills that keep her customers returning, but the quality of her work. Most of her competitors only do little alterations that don't last very long. "There's a cleaner near the post office and they even bring their work to me because they know I just want to do the job right!", she laughs and adds, "I don't think they know how to sew..."
Leilani's advice to new entrepreneurs is trite but true, "You have to work really hard. Just go, go, go, until you get what you want. Trust in yourself and in your abilities. Don't think negative things, only positive things. Don't be afraid. The more you walk forward and do hard things, I think you can make it." Just listening to Leilani makes it clear that it doesn't hurt to love what you're doing, either. "As long as you are happy with what you are doing, you will be successful. If you're new here, follow your dream! Go forward. Find what's good for you and don't stop." Leilani is clearly speaking from experience of the past two decades being a labor of love as she concludes after a brief moment of reflection, "I think this is my dream."
A Legacy of Entrepreneurship
Hugo grew up on a little ranch in Matatenas Vallecillo, Nuevo León, Mexico, about an hour south of the Laredo Texas border. As a nine year old, Hugo lost his father and had to drop out of school to help support his family and newly single mother. As an eighteen year old, with very broken English and only a 2nd grade education, Hugo decided to immigrate to the United States. Hugo went where the work was, which led him to Michigan, both North and South Dakota - pretty much every state where people were picking. He eventually landed in Richgrove, California to pick grapes where he would meet and marry his Wasco-native wife, Mary.

Hugo was a quick learner and a hard worker and soon became a foreman for local farm labor contractor, Bob Fortune. He was Bob's loyal employee for years and years, until one day, seemingly without warning, Hugo was let go. At the age of 47 with a mortgage and three young kids at home, Hugo knew he had to figure things out and fast. Mary told her husband that he needed to start his own business and simply go to the farmers and tell them he would bring the crews from now on. Thinking they had no money and knowing the risks, Hugo was understandably very scared but his dear wife wasn't ready to give up. Unbeknownst to Hugo, she had secretly saved $10,000 for such a time as this. With the encouragement of his strong and loving partner, he approached each farmer individually and asked for their business. His reputation as a man with a tireless work ethic served him well and farmer after farmer agreed to pay him. It was never Hugo's dream to start his own business, but he felt like it was his only choice and he rose to the challenge. Night after night, Mary and Hugo would return from the fields to go over all the paperwork and make sure the numbers were right. Hugo didn't know accounting but he was naturally good with numbers. Mary only had a 10th grade education. But together, they figured it out and eventually did well enough where they could hire bookkeepers to keep track of everything. They may not have known pricing strategies or cash flow statements but they knew exactly how many boxes of harvest per row it takes to fill a bin to the brim. They may not have known business but they knew their business and that was enough. Enough to gross over $10 million a year and oversee up to 350 employees at any given time. Much like his teams in the vineyards, Hugo continued to meticulously prune and craft his business for over 36 years. At 83, Hugo passed away, having truly worked every day up until the very end of his life.
Mary is now retired but the business has stayed in the family, under the direction their son, Roel. For two people who never "meant" to be entrepreneurs, they have set quite the pattern for their three children, who have started and owned four different successful businesses at various points in time. One of their children, Victor, attributes this to the fact that "We're pretty independent people. A big part of it is probably that we don't like other people telling us what to do. We like the challenge of starting something from nothing and trying to grow it." A challenge that seems in many ways even more daunting for the previous generation. "I can't imagine going to another country and trying to start a new business while trying to take care of my family." Victor speaks honestly, clearly in awe of what his parents were able to achieve. He continues, "My dad never talked to us about 'business'. But what we've learned most from watching my parents is work ethic - how to spend your time wisely and earn a living. They grew up so poor and when they saw that they could do better, they never wanted that to go away - they just wanted to work. And that's what they did." As an uneducated immigrant who struggled with English his entire life, Hugo often felt different from the community in which he lived and worked. Although Victor never felt that same isolation, he noticed it in his father and saw how ownership of a business affected Hugo in more than just economic ways. "I think it took my dad quite a long time to adjust...It probably wasn't until he was successful in his business that he started to feel comfortable with who he was in America."
He noted yet another benefit was the great sense of love and unity between his parents. "Starting the business was tough on their marriage of course, but they got through it together and my mom always loved and supported my dad until the day he passed." In an attempt to summarize these impactful memories and experiences into a digestible moral of sorts, Victor repeats a similar theme to Leilani. "Anything you want in life, you can make it happen. You just have to visualize it, and go after it. I know a lot people worry about how they are going to pay the bills - that story was my dad. But he found a way, he and my mom. I think the most important part of this was my mom. If it wasn’t for her telling him he could do it, he would have never done it. I think that’s true in life, when you have a good partner, you can make anything happen."
Individuals who are living in communities with immigrants are 36% more likely to feel positively about immigrants than those who say there are no immigrants living in their community. This seems intuitive enough, doesn't it? Familiarity tends to increase understanding. When these immigrants are our neighbors, our friends, our brother-in-laws, our florists, we are more prone to recognize their strengths and celebrate their successes. We are more prone to reap the benefits of diversity if they are nearby- if we are grabbing a delicious gyro on our commute home from work or if we are looking forward to the traditional dance and music shows at the Asian festival on the weekend. Viewing the one million plus newcomers each year as a lump sum, as opposed to widely diverse individuals with widely diverse backgrounds, interests, and aptitudes, leads to both misunderstandings and misrepresentations of the situation at hand. Perhaps the best way to change the perception of immigrants as burdens to that of important contributors is to remove the plural and let each person share their own story.
Michelle: My Immigration Story
Read to learn more about Michelle's Immigration Story.
Last Updated: January 15, 2020.
The journey began in Mexico right before Christmas. My mother picked me and my sister up early from school one day. I remember my sister and I were overjoyed to see her because she was usually busy with work and didn't have time to pick us up from school. I was only seven years old then, and I had no idea my life was about to change forever. Everything seemed normal as I packed a small backpack when I got home, and I still didn't know we were leaving when my mother gave me and my sister and early Christmas present that night right before we boarded a Greyhound bus. I think it all started to sink in when I arrived in Utah and I saw the snow falling. I had never seen snow before. It was cold but I ran around trying to catch it as it fell in flurries to the ground. We were in America now, and we were going to make it our home.

My first challenge was learning English. The kids at my elementary school crowded around me during recess and lunch and kept trying to get me to talk to them. They would hold up basketballs, or point at chairs and ask me questions. I had no idea what they wanted, and the professors didn't know what I needed either. I would often make gestures to get permission to go to the bathroom, or mimic what I heard my classmates say even if I had no idea what the words meant. My mother was having similar problems. She walked up and down the grocery store aisles not knowing what kind of food she was getting or what the cashier was telling her. It got worse when my sister and I began speaking our school learned English at home, which wasn't very good, but much more advanced than the English my mother spoke. My mother had no idea what we were saying to each other. That was when she decided we all had to learn to speak, read, and write English. She signed me and my sister up for a special reading class during the school year and a summer reading program. My mother also began volunteering at our local library and joined me and my sister when we attended the library activities. She did reading and writing homework with us and would go out of her way to speak English with whoever would listen. She even joined the PTA of my elementary school to practice her speaking with my teachers and peers. She did this for years, and I remember my mom gave a lesson to my technology class when I was in jr. high. She still spoke with a heavy accent, but her reading and writing skills were as strong as mine by that time, and she understood English just as well.

I was about fourteen years old when my mother got remarried, but it was not until I was in high school that we began thinking seriously about getting our green cards. Up until then, we had been undocumented and hadn't thought much of changing our legal status, but I was starting to think about furthering my education and realized that I didn't have a social security number and could not apply for admittance to universities or for loans to help me pay tuition. Without a green card, my education would end after high school not because I didn't want to study, but because I couldn't apply. I discussed my worries with my mother. She listened and decided that it was time to get our green cards.
My mother began asking her friends for help. Most of them told her to look it up online. When she ran a search for green cards a huge list of attorneys came up. All of them were asking for high amounts of fees to fill out forms and get appointments. The prices ranged from 400-1500 dollars just to start the applications. We didn't have that kind of money. My mother was a cleaning lady and we hardly had enough to make it from month to month. There was no way we could hire an attorney. She told me and my sister about how hopeless it all seemed as she drove us home from school one day, and we all got scared and I began to cancel all of my plans to further my education. This broke my mother's heart. She didn't come all the way to America for us to give up. We had to find a way to obtain our green cards and eventually citizenship.
My mother found a Hispanic center close to our home and it was there that she found out about the USCIS.gov website. It was free and had instructions on what forms to fill, documents to gather, and steps to take in order to get a green card. While my sister and I went to school she went to the library and the computer there to read the instructions and print forms. If she didn't understand something she would get a library assistant to help. She also called and visited the USCIS field office and visited the local Hispanic Center frequently for more complicated questions. She had to gather her previous divorce papers, all of our birth certificates, passports, and other documents that were listed in the instructions. What I remember the most was when we all had to get our vaccinations up to date. My sister and I only had to get the tuberculosis test because we had been going to school and needed to get shots regularly, but my mother had to get almost seven shots in one doctor's visit. We also visited the Mexican Consulate to gather documents and have more questions cleared up. I remember that every Sunday my mother would sit on her bed and fill out forms and put together folders. Sometimes I sat on the bed and helped her out.
Overall, it took us two years to gather everything we needed. We each had our own folder stuffed with forms and documents. We mailed them in and waited. We were afraid and one time my mother sat me and my sister down and explained that because we had been undocumented for some years, there was a small chance that we might get deported for a year before we got our green cards, but that we should not be afraid. After six months we got the letters for our interviews. Our cases had been processed and if we did well in the interview we would get out green cards. We woke up early, dressed up in our nicest clothes, and did our hair. We arrived at the time we were scheduled and waited in a large room filled with chairs. A few others were in the waiting room with us, all looking as nice and nervous as us. We waited for two hours before they called us in. My mother, step-father, sister, and I walked in. The room was a small and very short man with glasses sat at the other side of a desk. He called us all by name to make sure we were all present. He looked at my mother and said, "Everything looks ok. We have all of your documents." We all smiled, and I remember I clutched my hands tightly together on my lap. He continued his speech. "I just have one question for you. Do you have any kind of proof that you all do things as a family? Do you have family passes or memberships to parks or events that you can show me?" We all looked at each other. We went to the movies every weekend, went swimming, had dinner together, and went to church but we had no way of proving it. My mother thought for a minute and then opened up her wallet. She pulled out a membership for the Clark Planetarium in Salt Lake City. My step-father, sister, and I followed her lead and pulled out our memberships too. The man smiled. "Alright. Congratulations," he said, and we all took a sigh of relief. My mother almost began to cry and she asked the man if she could give him a hug. He politely denied and shook all of our hands instead. We all hugged each other when we reached the parking lot and laughed and decided to go out to dinner to celebrate and we smiled and celebrated again when our green cards arrived in the mail a couple of months later. All the time, effort, and persistence paid off and my mother, sister, and I were finally permanent residents of the United States.
That victory was seven years ago, and thanks to my mother's hard work I am now about to graduate from Brigham Young University and my sister has a good job and has bought a house with her new husband. Currently, we are all going through the process of getting our citizenship. This has been much easier. Again, my mother has done all the work herself with the help of the USCIS.gov website. Since we are all adults now, we were able to work and save money to pay the necessary fees in about a year. Just the other day we all received our appointments for our interviews where we will turn in our green cards and be sworn in. My sister and I don't have to take a government or language test because we went through the public school system, but my mother got a list of books to get so she can begin studying for her exams. The books are inexpensive and she is excited to look over them and study when they arrive in a couple of weeks. Again, we are all a bit nervous but we are also relieved that we were able to get this far with free resources and hard work.
Best Non-Profits for Immigration Help
Nonprofits that have proven results in facilitating a better experience for immigrants in the US.
Last Updated: January 15, 2025
Here at SimpleCitizen we provide immigrants with tools and expertise in order to make your status goals here achievable. Of course there many organizations that recognize the value of welcoming those that share the American dream. In order to give you the necessary tools to accomplish you goals, here are descriptions of nonprofits that have proven results in facilitating a better experience for immigrants of America.
In no particular order...
Refugees
International Rescue Committee - Better Aid
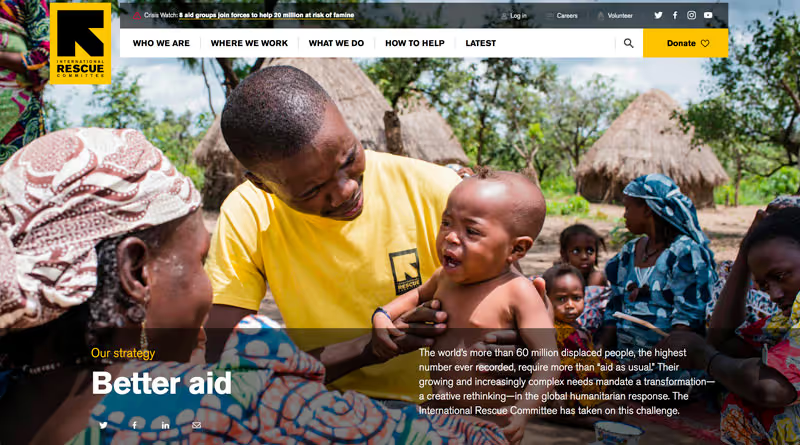
The world’s more than 60 million displaced people, the highest number ever recorded, require more than “aid as usual.” Their growing and increasingly complex needs mandate a transformation—a creative rethinking—in the global humanitarian response. The International Rescue Committee has taken on this challenge.[/caption]
The IRC works all around the world with a wide variety of issues, in the United States alone the IRC helped resettle 13,400 refugees in 2016. They have a very holistic approach to resettlement, primarily focused on immigrants that are fleeing a crisis. The IRC was started 80 years ago by Albert Einstein, whose genius seems to have penetrated the organization to this day. Fast Company claims that "...none that can rival its ability to help refugees and displaced people at every stage, from emergency response to resettlement..."
With such a wide variety of help across the entire nation, the IRC is one of the top resources for refugees. You can get the contact info of branches all over the world here. It'd be impossible to go over all the services they offer in this article, but you can take a look at what they do in Education, Health, Economic Wellbeing, Empowerment, Safety and Gender equality on their website. Did we mention they have a very holistic approach? And if you want to join the cause, they also have a variety of volunteer and internship opportunities.
Deportation
For those threatened by deportation it can feel like such a life-changing event is completely out of your hands. Both United We Dream and Families for Freedom are committed to giving immigrants the tools to empower those in the face of deportation.
United We Dream - Immigrant youth building a movement for justice
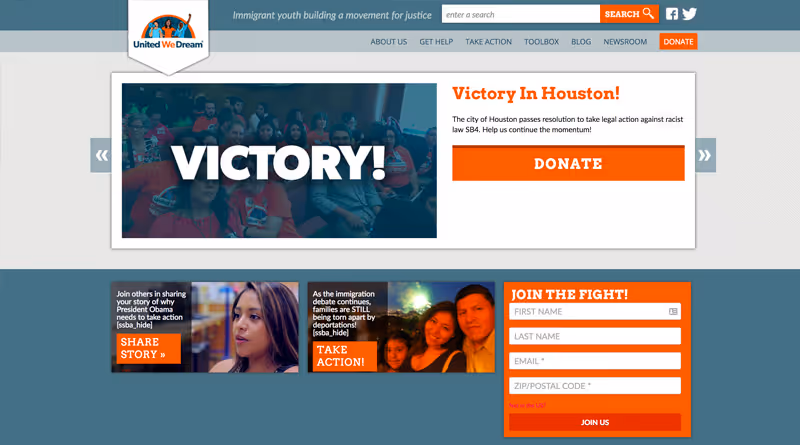
Over 100,000 immigrant youth and allies. Fifty-five affiliate organizations. Twenty-six states. Oh, and its a youth-led organization. United We Dream has a huge network that they use to run immigrant-related political campaigns like stopping deportations and access to higher education. They have even branched into the "intersection of queer and immigrant rights." If any of these issues are relevant to you, then you can Get Help! You can also find a local group to participate in here.
Whether there is a local group near you or not, United We Dream has provided a Toolkit to help immigrants all over America. Their website includes an ICE activity reporting hotline as well as Deportation Defense Cards that you can download in multiple languages. They recommend that if you feel threatened by deportation to keep the card with you at all times.
Families for Freedom - "As long as deportations and unjust immigration policies continue we will continue to fight to keep our families together"
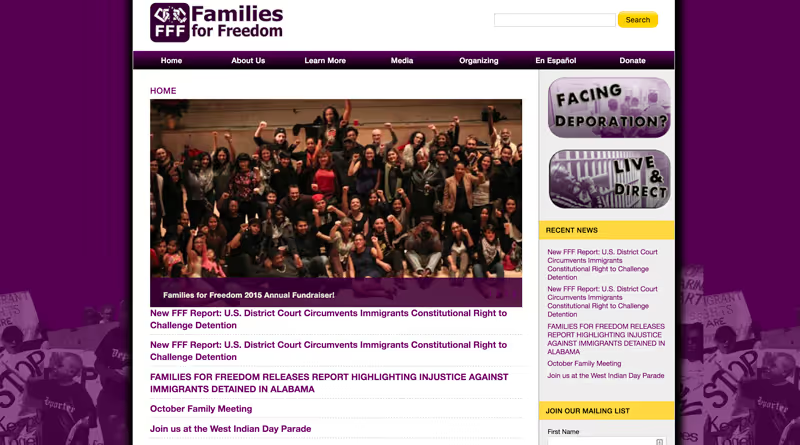
Founded in September 2002, Families for Freedom is a New York-based multi-ethnic human rights organization by and for families facing and fighting deportation.[/caption]
FFF started in response to the persecution to the often unmentioned victims of 9/11, when the wave of fear that followed one of America's greatest tragedies became directed to innocent Arabs and Muslims. FFF started with three families in a small apartment, you can read their powerful story on their The History of Families for Freedom page. Although initially FFF was focused on helping Arabs and Muslims, they have since expanded their net to include all immigrants. Like United We Dream, FFF has resources for understanding deportation threats, how to behave when your are threatened by deportation, understanding your rights, and a deportation hotline as well.
Both of these nonprofits are a powerful example of grassroots mobility and the power that average people with with a unified cause. If you feel threatened by deportation, start becoming familiar with their tools today.
Community Resources and Integration
Moving into new communities as an immigrant is full of challenges. Welcoming America and the U.S. Committee for Refugees and Immigrants use their vast network to support immigrants and the organizations that want to greet them in America.
Welcoming America - Building a Nation of Neighbors
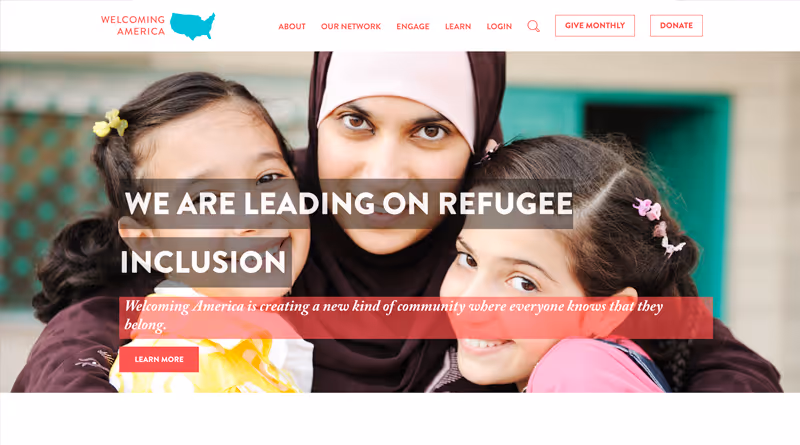
Welcoming America began after founder David Lubelli's method for transforming the community mindset in Nashville began being copied other parts of the country. After realizing the potential of the the strategy he had implemented, David first went to Harvard for a year to study policy and social psychology, and to perfect his method. Then came Welcoming America, a platform to make the communities more "fertile" for welcoming immigrants. David recently got the Charles Bronfman Prize, and you can be rest assured any organization found on their Network Map will have been trained to fully support your integration in the community.
U.S. Committee for Refugees and Immigrants
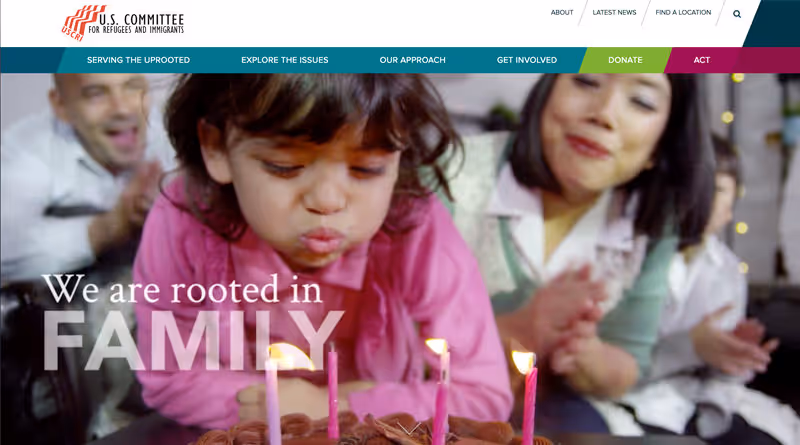
Founded in 1911, the U.S. Committee for Refugees and Immigrants has deep roots in watching over vulnerable immigrant communities. Their rich history and commitment to providing homes for the needy has made them a leader in determining what needs to be facilitated to help immigrants be successful in America. This makes both the Committee's own offices and their partners a trusted resource. For the four offices in New York, Iowa, Virginia, and North Carolina, some of the services they provide include:
- Naturalization
- Asylum
- Special Immigrant Juvenile Status (SIJS)
- Family-based Immigration Petitions/Applications
- Consular Processing
- Adjustment of Status Applications
- Work Authorization
- Green Card Renewal Applications
- Self-Petitions for Battered Spouses and Children (VAWA)
- Temporary Protected Status (TPS)
- T Visa (victims of human trafficking)
- U Visa (victims of crime)
- Removal of Conditions to Permanent Resident Status
- Removal Proceedings
Of course their network of 97 partner organizations is another valuable asset. You can view their agency map here.
Immigrant Rights
American Immigration Council - Honoring our Immigrant Past, Shaping our Immigrant Future
Shaping our immigrant future.
Hopefully you will never need the American Immigration Council's direct services. As one of the heavy hitters among immigration litigation, they deal in the most critical immigration cases that shapes how the country interprets immigration law. In fact, they are so important that they will never resort to shortening their name in an acronym, instead referring to themselves as "the Council."
The Council has done a lot of good for the rights of immigrants. They are a nationwide fearless defender of fair interpretation of the law. When government agencies neglect or oppose their duty to uphold immigrant rights, the council will not hold back punches. You can read a Washington Post article about the Council's law suit against top U.S. officials including Homeland Security Secretary John F. Kelly here. In a time where the norms of government are being disrupted left and right, the American Immigration Council serves as a nonpartisan advocate for respect and accountability in immigration law.
In addition, the Council provides of valuable research to inform the public with their website http://immigrationimpact.com. It's a great resource for staying up-to-date on immigration news and developing issues. In their own words "The Council is a national leader in challenging the myths and misinformation that too often dominate the political and public debate around immigration." Finally, the Council has an Exchange Visitor Program which utilizes the J Visa sponsorship to enhance and promote cultural exchange.
Benefits
Immi - Understanding Your Options
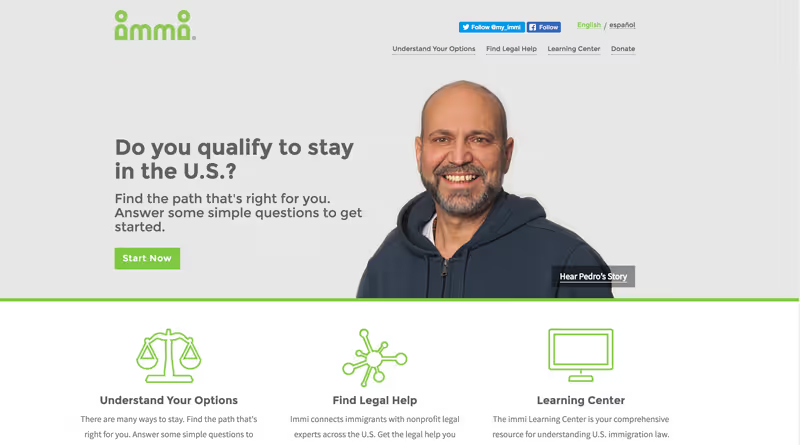
Do you qualify to stay in the U.S.? - Find the path that's right for you. Answer some simple questions to get started.[/caption]
Little know secret, being informed about your immigration options is complicated.
Ok maybe that's not a secret, and maybe it doesn't have to be complicated.
Immi's somewhat clunky slogan tells you exactly what they do. However, their online screening tool is more like the name of this innovative nonprofit - user-friendly and techy. Immi's online screening tool allows immigrants to easily gain a better understanding of their legal options. After completing the survey, your results are sent to your phone or email. Imagine, 1.5 million undocumented immigrants having access to a tool that explains what benefits they are personally eligible for.
In addition, despite being less than a year old, Immi's has one of the best immigration Learning Centers and Legal Help directories, both powered by the vast data and experience of its two parent organizations: Immigration Advocate Network and probono.net. These two organizations have partnered before on several projects, and their past working relationship allowed them to respond with serendipitous timing to the sense of urgency catalyzed by American political rhetoric.
Local organizations can be found by Immi's Legal Help tool, which provides a user-friendly search engine to find helpful organizations nearby, primarily with legal help. In addition to filtering by location, you can also narrow your search by organizations that provide the specific services you need (including non-legal), populations served and other relevant criteria. Rest assured, all non-profits found at Immi have been recognized by the Board of Immigration Appeals (BIA), or at least have staff that are included in their directory.
Honorable Mentions
HAIS
HAIS has study guides for citizen test available and subtitled prep videos in six languages: Arabic Nepali, Serbo-Crotiaon/Bosnian, Somali, Spanish, Vietnamese
Americans for Immigration Justice
A unique combination of free direct services, impact litigation, policy reform, and public education at local, state, and national levels.
Upwardly Global
They work with skilled immigrants to find employment in the United States
The Young Center
This organization upholds immigrant child rights, they have a referral function on their page if you know of an immgrant child that could use their services
What to do if you have lost your Passport
For information on how to replace your passport and visa, follow the steps outlined below.
Passports and visas are official travel documents that all foreign citizens coming to the United States must have to show one's country of citizenship and legal status in the U.S., as well as to enter and leave the country. Losing these important documents can be very stressful - here's a short guide to help relieve some of that stress and move forward.
First of all, don't worry. Your visa is needed only to enter the United States; it has no relevance to your stay here after entry. In other words, if you happen to lose your visa while already in the country, you may remain the entire length of your authorized stay (as shown on your admission stamp or Form I-94, Arrival/Departure Record) without any problems. You will, however, need a valid passport to depart the United States and enter another country. For information on how to replace your passport and visa, follow the steps outlined below.
Search
Make sure your passport/visa are actually lost and not just misplaced. Search your home, luggage, wallet/purse, and anywhere else you may have stored them. Ask family members and travel partners if they have any knowledge of the documents' location.
File a Police Report
If you still cannot find your passport/visa, go to your local police station and report your document(s) lost or stolen. If you have copies of the original documents, bring them with you. You will then be issued a police report detailing the incident. Make a copy of the report for your own records.
Report Loss of Your Passport
Contact or visit your country's embassy or consulate in the U.S. to notify them of your missing passport and for instructions on how to obtain a new one. If you think your passport has been stolen, reporting this will help guard against fraudulent use. It is extremely important that you perform a thorough search before you report it lost or stolen, because once reported, your passport is no longer valid for travel. However, if you find your passport after having reported it lost or stolen, it may still be used as a valid form of personal identification.
- If you do not have another form of photo identification, contact your country's embassy/consulate to find out what alternate documents you may need.
Report Loss of Your Visa
To report your visa lost or stolen, email the U.S. Embassy or Consulate outside the United States that issued your visa. Go to the U.S. Embassy or Consulate website to locate the corresponding email address and contact information. Be sure to include your full name, date and place of birth, current address in the United States, and your email address. Clarify whether your visa was lost or stolen, and if you have a copy of it include it in the email. If you know the category of visa you have or your passport number, include these too.
Like your passport, if you have already reported your visa as lost or stolen to the U.S. Embassy or Consulate but later find it, your visa will be invalid for future use, and you will have to apply for a new one.
Applying for a Replacement U.S. Visa
For future travel into the United States, you will need a new visa. Unfortunately, lost or stolen visas cannot be replaced in the United States. For replacement, you must apply in person at a U.S. Embassy or Consulate abroad. When you apply for a visa replacement, you will need:
- A written account documenting the loss of your passport and visa
- A copy of the police report
A Few Things to Keep in Mind
- Again, you won't have any problems remaining as long as originally authorized, but you will need a new passport before you return home. The replacement process can take time, so begin as soon as possible to ensure that you have a new one in time for your return trip.
- Some embassies and consulates may offer faster processing procedures, so ask if them if there is a way to process the new passport quickly.
- Traveling while you wait for your new passport can be risky, so try to postpone travel plans until you receive your new passport.
- If you need to complete an I-9 for employment (employment verification form), wait until you have your new passport before processing the form.
One Last Tip
We recommend making copies of all travel documents in your possession as soon as possible after arriving in the United States. These include your passport biographic page, visa, and admission stamp or Form I-94. That way, if you do lose one or all of these important documents, the recovery/replacement process will be that much easier. Remember to stay calm, follow the procedures outlined here, and respond to all questions and embassy/consulate employees honestly and accurately - before you know it, you'll be along your way as if nothing ever happened. Safe travels!
What happens at the Biometrics Appointment?
An overview of what to expect during your USCIS biometrics Appointment.
Last Updated: January 15, 2020.
The biometrics appointment sounds technical and is often intimidating for people, but it's usually a very straight-forward appointment! In order to confirm your unique identity, the USCIS collects data for many reasons, one is to ensure that whenever YOU sign a document in the future, it really is you! It also helps deter people with criminal records from applying for USCIS benefits for which they are not eligible. Here are some of the most common questions about the appointment, as well as some common problems and how to prepare for them.
What exactly does “biometrics” mean?
Biometrics is the process of capturing your unique features by putting your fingerprints, photograph, and signature on file so that the USCIS can confirm your identity in the future.
Who has to attend the biometrics appointment?
The USCIS can require biometrics from any applicant, sponsor, or beneficiary living in the US for any immigration or naturalization purposes. After filing your application, petition, or request you will receive a notice telling you where and when you need to go for the appointment.
If you are under the age of 14, you may choose to sign if you are able to, or a parent or legal guardian may sign on your behalf.
How should I prepare for the biometrics appointment?
It is a good idea to make copies of your application, petition, or request. You may bring a copy (as the USCIS will not provide you with one), but you should also do this to keep for your records and to review your forms before the appointment. Your personal appointment notice will include specific instructions on what you need to bring. Everyone MUST bring the ASC appointment notice (Form I-797C) and a valid photo ID (like a green card, passport, or driver’s license).
For most people, the biometrics appointment is nothing to be worried about! If you think you have a criminal background, you may want to contact a lawyer for further advice.
What should I expect at the biometrics appointment?
You will first be asked to reaffirm the following “Acknowledgement of Appointment at USCIS Application Support Center” statement:
I declare under penalty of perjury that I have reviewed and understand my application, petition, or request as identified by the receipt number displayed on the screen above, and all supporting documents, applications, petitions, or requests filed with my application, petition, or request that I (or my attorney or accredited representative) filed with USCIS, and that all of the information in these materials is complete, true, and correct.
If you cannot reaffirm that this is true, your appointment will be rescheduled until you can refile your paperwork.
Given that everything you submitted was true, the USCIS will capture your fingerprints (either 2 or all 10, depending on the type of ASC notice you received), your photograph, and your digital signature.
What if I am applying from outside the United States?
The process is a bit different in this case. When you file your Application for Naturalization (Form N-400) you have to include your completed fingerprint cards (Form FD-258) and two passport style pictures. For specific instructions and details regarding those, look here and here, respectively.
If you are active duty military or are applying under sections 328 or 329 of the Immigration and Nationality Act and you live outside the U.S., look here for more information.
What if I require assistance?
Many people require assistance for the appointment. Here are some of the common issues people may have, and the solutions provides by the USCIS to make this process as easy as possible.
Common Concerns
I can’t speak English.
You may bring someone with you who can translate for you.
I can’t read English.
For the “Acknowledgment of Appointment” statement, you should go here to select the language you can read and review the translation before your appointment.
I have a disability that prevents me from signing my name.
They will accept any mark (such as an “X”) as a signature. If you cannot provide this, there are other procedures in place to capture your biometrics.
I have a disability that will require further assistance.
You may bring a family member, attorney, or accredited representative to assist you.
I have a disability that will require further accommodation.
As soon as you arrive you should speak to the ASC immigration services officer for help. There are tons of accommodation services available, but you will likely need to request them in person. You can also try contacting your local Application Support Center before the appointment. Their contact information should be on your appointment notice.
Why might I have additional biometrics appointments?
Because biometrics data is only considered valid for 15 months, you may be required to attend more than one if your application is pending for longer than 15 months. You will also have to attend a new appointment should you apply for a different USCIS benefit.
What if I am uncomfortable with the government having my fingerprints and other personal data?
Unfortunately, if you refuse to provide anything that is asked of you during the biometrics appointment, your application will more than likely be refused. Biometrics are being used increasingly around the world and seem only to be gaining popularity by international law enforcement and immigration services, so you will likely be asked to provide similar levels of data to obtain a visa or green card in most countries.
Perhaps it may be found within a different category.