How to use SimpleCitizen
Updated: February 2023
Welcome to SimpleCitizen! We’re happy you’re here! We’ve been making it easy to get a green card, renew a green card, apply for citizenship, and more since our launch in 2015. Today, we’re rated the #1 Online Green Card service.
To learn more about our track record, here are a few links:
• Our certified customer reviews – Trustpilot
• Rated #1 2018, 2019, & 2020 Online Green Card Service – Top Consumer Reviews
• The Business that Love Built – Fast Company Magazine
• Featured by the American Bar Association – 2019
The following article is designed to help you better understand what it is that SimpleCitizen offers and how it works. We’ve broken this article into steps. If you have any questions about our services or our offerings, please feel free to reach out to our Live Chat support line. If you are messaging after business hours, please feel free to leave a message and we will get back to you as soon as we are available.
Step 1: Find the right application with the Eligibility Quiz
In order to make sure you are eligible to apply and that you choose the correct application for your situation, we have created a free eligibility tool. With just a few easy clicks it will use the information you provide to help guide you to the correct signup page for the application that you are looking for. After you select your application package and your payment tier, you will be emailed a link to help you log into your new Simplecitizen account.
Please note that if you have a preexisting SimpleCitizen account, you will not be able to sign up for a new account using the same email. For assistance, please reach out to our live chat support team.
If you have questions during the eligibility quiz, please feel free to chat with SimpleCitizen support by clicking on the chat icon at the bottom left side of the screen.
Step 2: Review the Welcome Page
After you login to your SimpleCitizen account for the first time you will see the Welcome Page. This page acts as a landing page with the tips and tricks designed to help you be successful as you navigate filling out the questionnaire and documentation upload sections. Please pay close attention to these as they will guide you through completing everything in the questionnaire as quickly and as smoothly as possible.
Step 3: Fill out the questionnaire
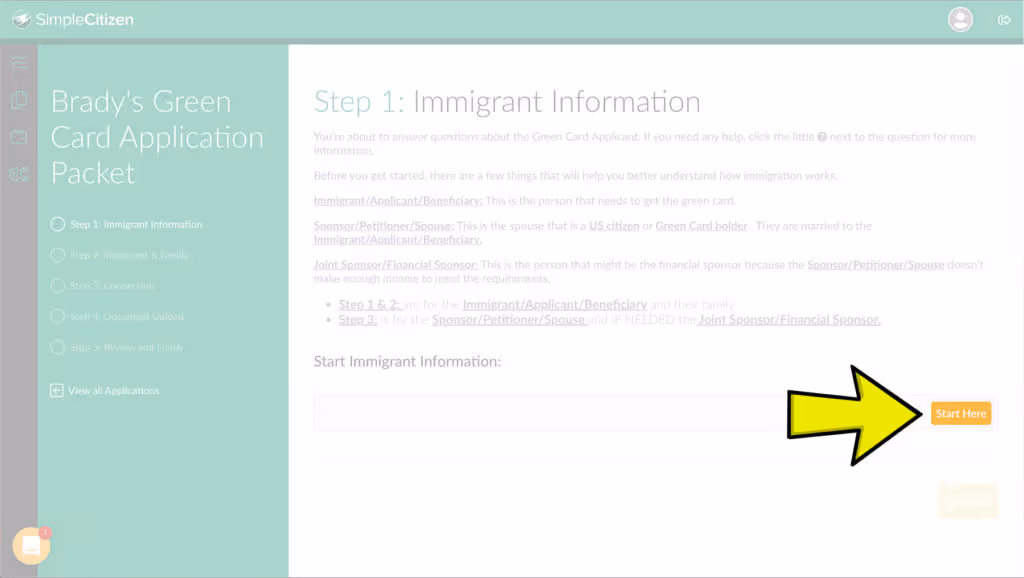
After you review the information and resources on the Welcome page you will then want to begin the questionnaire. To get started on your application, click on the “Start Here” button (as pictured below). The questionnaire will help guide you through all the information on the USCIS form(s) associated with your application. It will use your answers to help you select the correct forms. If your application has optional forms (such as work authorization or travel authorization) we will give you the ability to choose if those are forms you would like to submit to USCIS.
The questionnaire has multiple sections – please ensure you go through all of them before moving on.
The questionnaire is full of information text and links to help make USCIS questions as clear as possible so you don’t have to guess. There are multiple steps and each step must be completed prior to continuing to the next step.
If you have questions as you fill out the information we have a chat feature where you can reach out for help and guidance.
Step 4: Supporting Document Upload
Once you have completed all sections of the questionnaire, you will then be able to access the Document Upload section. The document upload is where you will upload all the required supporting documents for your application. These uploads are determined by how you answer questions in the questionnaire.
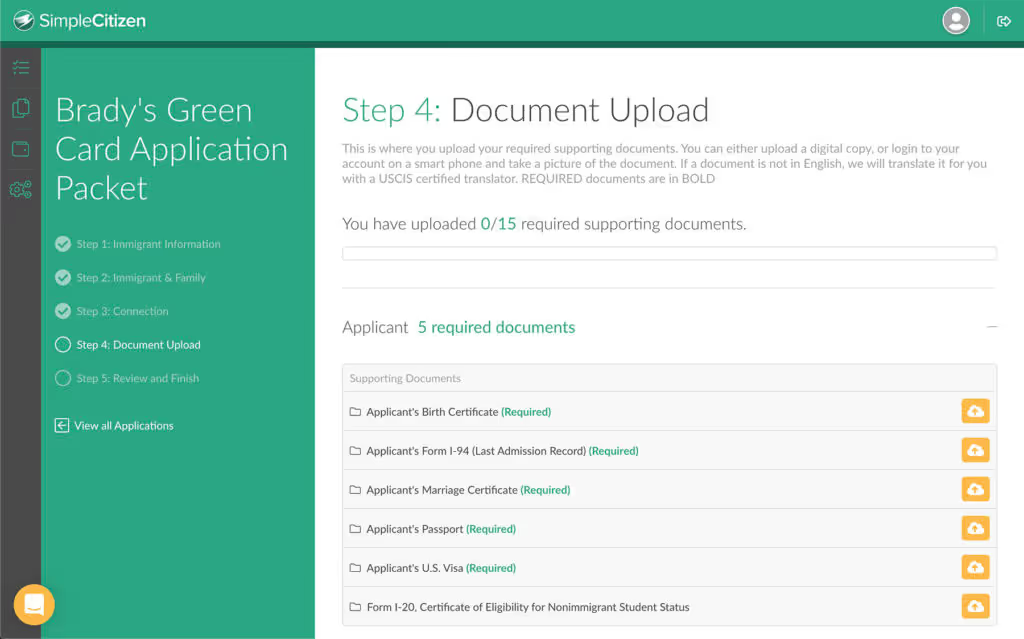
Click on the orange upload buttons to upload each document. As you are uploading files the system will allow you to upload multiple files under a single upload.
Supported file types include: JPG, PNG, & PDF, however PDF uploads are the most clear. If you would like to convert your documents to PDF there are free services such as the Adobe PDF converter that can be used to do so, Adobe also has a PDF Merger that you can use to combine multiple documents into a single file. This is helpful especially for files that you want in specific orders, such as chronologically ordered pay stubs or tax documents. If you do not have a scanner for your documents, you can login to your account on a smart phone and take pictures of your documents with a camera phone.
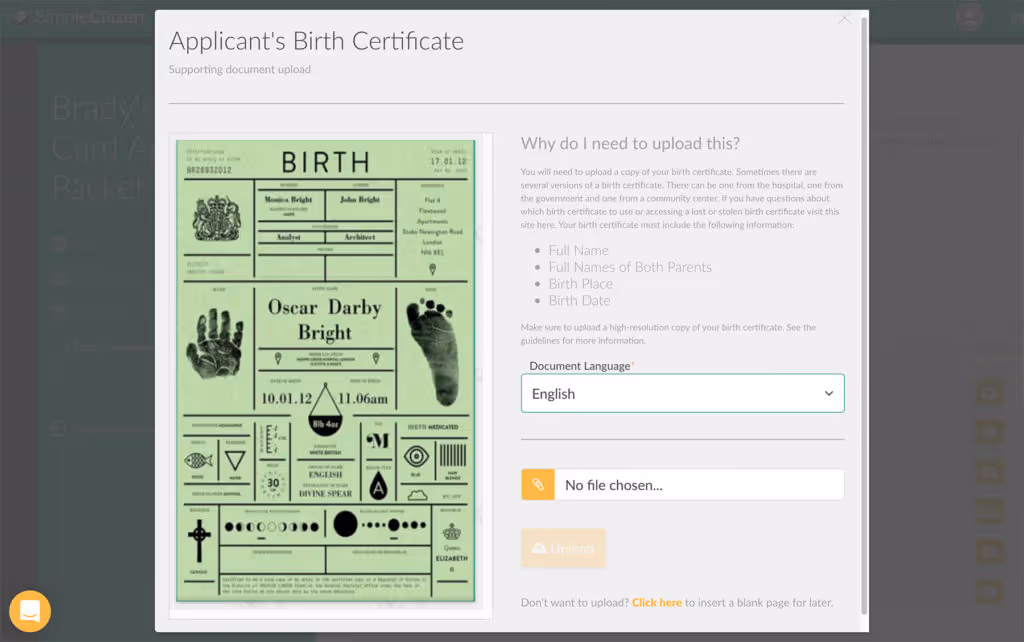
Translations of USCIS required documents: When uploading a required USCIS document, please indicate the “Document Language” by choosing from the drop down. This will let SimpleCitizen know that the document needs to be translated by a USCIS certified translator. We provide translation services at no extra cost for those required documents.
If you have questions or need help with your supporting documents, please reach out to our live chat support team.
Step 5: Immigration Attorney Review and Feedback Implementation
With SimpleCitizen, all applications receive the benefit of having your entire application reviewed by an immigration attorney from our network attorney. This review will ensure that there are no mistakes or missing paperwork in your application. They will complete their review of your application within 5-10 business days and you will then be assigned a case support team who will communicate the attorney feedback to you.
Once you receive the feedback, you should go into your questionnaire and make the requested changes. If you have any questions regarding the feedback or how to implement those changes you can reach out to your case support team and they will guide you. After you have implemented all of the requested updates to your questionnaire, please let your case support team know that you are finished.
Reminder: SimpleCitizen partners with an independent network of immigration attorneys for the review of your application, but we are self-service. Applicants are able to choose how to implement suggestions received from the attorney, but if an RFE (request for evidence) is received from USCIS or your application is denied due to a decision to not follow our network attorney’s suggestions or to alter the application following their reviews, your purchase is not covered by the SimpleCitizen Satisfaction Guarantee.
Step 6: Case Support Team Review
After you notify your case support team that you have implemented the requested changes, they will check the updates and verify if all changes are made in accordance with the attorney’s recommendations. This typically takes 1-3 business days. In order to help this process go more quickly, please take extra care to ensure that all recommendations have been implemented before moving on so that the case support team can approve the application for finalization.
Step 7: Customer PDF Review
Once your case support team has confirmed that all of your changes have been implemented correctly, they will send you a PDF draft of your application for you to review. Please review it carefully and keep detailed notes as you go. Your case support team can then help you make any last-minute changes.
Pro Tip: If, during your review, you notice that some of the information is incorrect, take a look at your questionnaire and make sure it has been entered correctly.
Step 8: Application Printing & Delivery
Once the reviews are complete, our team at SimpleCitizen will print and ship the application to you. You should also send a confirmation to your case support team with your preferred mailing information. The shipping team will take 1-2 business days to prepare your application for mailing. You will then receive a tracking number so you can track the package.
Step 9: Receive Application and Mail to USCIS
The application will be sent to your mailing address and will include detailed USCIS filing instructions so you’ll know exactly what you need to do and how to do it. It’s really simple- All you have to do when you get the application is sign the forms (we attach stickers so you know who needs to sign where), attach payment, and passport style photos (if required). We also include a pre-addressed USCIS shipping envelope for you to insert the signed application and take it to your preferred courier service for mailing.
As always, if you ever need any help, please reach out to our support team. We’re here to help!
Not yet a SimpleCitizen customer and want to get started?
The best place to start is our free eligibility tool. It will help guide you to decide which package is best for you.
If you have questions during the eligibility quiz, feel free to chat with SimpleCitizen support by clicking on the chat icon at the bottom left side of the screen. After you select your application package, you will be emailed a link to your new account.
Related
Getting Started
Articles
Begin Your Immigration Journey Today with SimpleCitizen!
Why spend more time and money on countless legal headaches, when you could just use SimpleCitizen and focus on what matters most – being with those you love! Find new opportunities, start new adventures, and bring your family together with SimpleCitizen today!